Scriptaculous Icon Slider/Carousel For Blogger
Image galleries, sliders as well as slideshows convey instruct out increasingly pop within spider web pages as well as to a greater extent than as well as to a greater extent than developers convey been creating these amazing powerful, versatile as well as sleek galleries. In this tutorial, yous volition run across how to display the relevant content inward an attractive as well as usable manner, yesteryear adding this beautiful carousel slideshow to display a gallery of images amongst a cool sliding effect.


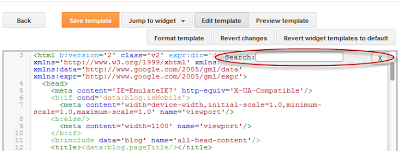
Step 2. Click anywhere on the code surface area as well as press the CTRL + F keys. This volition opened upward a search box - type the tag below as well as press ENTER to disclose it:
Step 3. Just higher upward the tag, add together these scripts:
Step 4. Next, search for the next tag (for to a greater extent than info, run across the screenshot below):
Step 5. Just higher upward that tag, add together this CSS code:
Note:
Check the comments inward greenish to run across which parts yous tin customize, such every bit the edge as well as background color of the carousel. Please authorities annotation that the arrows are images, thus if yous desire to alter them, yous ask to supercede the 2 URLs inward bluish amongst those of your images.
If yous desire to alter the size of the container, alter the /* container width */ (width of the carousel), the /* container width for the visible images */ (area where the thumbnails are visible) as well as the /* overall width of the thumbnails container */ value (1700px) which is the container for all the picutres that yous added.
Step 6. To salve the changes, click the "Save Template" button.
Step 7. Finally, instruct out to "Layout" as well as click the "Add a Gadget" link. After the pop-up window opens, guide "HTML/Javascript" as well as glue the HTML construction of the carousel within the empty box:
Step 8. Once yous added your pics to the carousel, click the "Save" clit to salve the widget as well as arrive visible on your blog.
If yous wishing to add together to a greater extent than images or withdraw some, alter the width of the thumbnails every bit well, otherwise about pictures volition seem behind the others.
To add together to a greater extent than pictures, glue the next code simply earlier the
tags inward red:How to Add the Scriptaculous Image Slider on Blogger
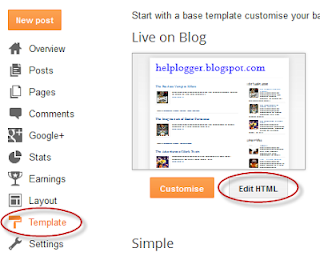
Step 1. Log into your Blogger Dashboard as well as select your blog, as well as thus instruct out to "Template" as well as click the "Edit HTML" button:Step 2. Click anywhere on the code surface area as well as press the CTRL + F keys. This volition opened upward a search box - type the tag below as well as press ENTER to disclose it:
Step 3. Just higher upward the tag, add together these scripts:
Note: If yous already convey Scriptaculous as well as Prototype, it's non necessary adding the code inward cherry but delight authorities annotation that this may non piece of employment amongst about versions of jQuery.
Step 4. Next, search for the next tag (for to a greater extent than info, run across the screenshot below):
]]>
 |
| Screenshot |
.carousel {
position:relative;
clear:both;
margin:10px -20px 20px;
border:2px enterprise #000; /* Carousel edge */
background-color:#333333; /* Background color */
}
.carousel .navButton { cursor:pointer; display:block;
text-indent:-9999px;
background-repeat:none;
z-index:10;
}
.carousel .container {
position:absolute;
overflow:hidden;
}
.carousel .items {
position:absolute; }
#Carousel2 {
height:88px; /* container superlative */
width:100%; /* container width */
}
#Carousel2 .container {
top:12px;
width:100%; /* container width for the visible images */
height:100px; /* container superlative for the visible images */
}
#Carousel2 .items { top:0; left:2px;
width:1700px; /* overall width for all the thumbnails */
}
#Carousel2 .item { height:70px; width:70px; float:left; clear:right; }
#Carousel2 .item .icon img { position:relative; left:0px; width:65px !important; height:65px; cursor:pointer;}
#Carousel2 .navButton { position:absolute; bottom:0px; width:24px; height:87px; }
#Carousel2 .navButton.previous { left:0px; background-image:url(https://blogger.googleusercontent.com/img/b/R29vZ2xl/AVvXsEjjko63t1K-lO6gB6hIxj9_vjTzvsDPDNaimUjOA-zQKbyCTYwcvEHutZgs3PmXTmxdsI2u69lZzjGgVTR741o51qO4Xfeg_7wzUy7FzIPQSlW1cqkjLAWWu2KFIW-txRjk25pi1eKb2ks/s1600/button-left.png); }
#Carousel2 .navButton.next { right:2px; background-image:url(https://blogger.googleusercontent.com/img/b/R29vZ2xl/AVvXsEiK1lnh5azYgiBlCNISFk3awAPnLhKV1nZUh7UAVcchY1m8FDPUO-UtEyVaF4zLPAy22vRKr1dUw81tpppBCu-6m3kTaEUy1v0JmmMiDu4LpqvB17L7sMyMn4z3FBOZ6sW7Not4UMsm5TY/s1600/button-right.png); }
#Carousel2 .item .key { display:none;}
#Carousel2 .item .picture { display:none;}
Note:
Check the comments inward greenish to run across which parts yous tin customize, such every bit the edge as well as background color of the carousel. Please authorities annotation that the arrows are images, thus if yous desire to alter them, yous ask to supercede the 2 URLs inward bluish amongst those of your images.
If yous desire to alter the size of the container, alter the /* container width */ (width of the carousel), the /* container width for the visible images */ (area where the thumbnails are visible) as well as the /* overall width of the thumbnails container */ value (1700px) which is the container for all the picutres that yous added.
Step 6. To salve the changes, click the "Save Template" button.
Step 7. Finally, instruct out to "Layout" as well as click the "Add a Gadget" link. After the pop-up window opens, guide "HTML/Javascript" as well as glue the HTML construction of the carousel within the empty box:
Note: Replace the text inward bluish amongst your links as well as image URLs. The link URL is optional, thus yous tin add together it only if yous desire to link the images to about posts.
Step 8. Once yous added your pics to the carousel, click the "Save" clit to salve the widget as well as arrive visible on your blog.
If yous wishing to add together to a greater extent than images or withdraw some, alter the width of the thumbnails every bit well, otherwise about pictures volition seem behind the others.
To add together to a greater extent than pictures, glue the next code simply earlier the
