A detailed guide on installing Kali Linux on VirtualBox
A detailed guide on installing Kali Linux on VirtualBox
A lot of the users would like to do crazy stuffs with their Kali Linux. If you’re doing something you’re not sure, you want to install unknown packages, modify some code but don’t want to break your HOST OS, running and installing Kali Linux on VirtualBox is the best way to go. You could also try using VMware but as VMware is proprietary and VirtualBox is free to use, there’s no argument which way usual users would go. Running Kali Linux on VirtualBox is great as in that way all you need to do is take a snapshot and if you break sometime, you can quickly roll back. This imposes another problem though. If you keep breaking things and keep rolling back for everything, you don’t really learn the Operating System itself. You are learning to bypass and overlook a problem with a easy way out. I am going to judge that? Maybe not. Linux can be quite complicated sometimes specially you never used it before. You might have just heard about Kali Linux from a friend and learned how much it can achieve and wanted to give it a try without actually installing it in your hard disk alongside your primary OS (may that be Windows or Linux or MAC).
Contents [show]
Pros of running Kali Linux on VirtualBox
- You can run more than one OS simultaneously.
- You can install/re-install/backup/move/restore/rollback your guest OS easily.
- You can manage allocation of resource (Memory, Hard disk). Resource Management!
- You can copy your VirualBox to a different machine. Portability!
- You can completely break your installation and roll back in few clicks.
- You’re forced to troubleshoot and thus learn.
- Great for learning and testing.
Cons of running Kali Linux on VirtualBox
- Performance drop. Usually much slower.
- GPU Acceleration doesn’t work.
- USB Wireless cards can be problematic.
- You tend to avoid learning troubleshooting and just rollback quite often.
- You won’t be comfortable installing and running in real machine if you’re too used to VM’s.
- Can’t use FULL graphics as the card is Virtualized.
- Adds an additional layer between OS and actual hardware.
Saying all that, it’s true for any Virtualized environment. If you’re learning, testing.. yes go ahead. Even best one uses VM’s to test cause it’s just too much time consuming to install and re-install and update.
What is VirtualBox
VirtualBox is a general-purpose full virtualizer for x86 hardware, targeted at server, desktop and embedded use. It is a powerful x86 and AMD64/Intel64 virtualization product for enterprise as well as home use. Not only is VirtualBox an extremely feature rich, high performance product for enterprise customers, it is also the only professional solution that is freely available as Open Source Software under the terms of the GNU General Public License (GPL) v2. Presently, VirtualBox runs on Windows, Linux, Macintosh, and Solaris hosts and supports a large number of guest operating systems including but not limited to Windows (NT 4.0, 2000, XP, Server 2003, Vista, Windows 7, Windows 8), DOS/Windows 3.x, Linux (2.4, 2.6 and 3.x), Solaris and OpenSolaris, OS/2, and OpenBSD.
VirtualBox is being actively developed with frequent releases and has an ever growing list of features, supported guest operating systems and platforms it runs on. VirtualBox is a community effort backed by a dedicated company: everyone is encouraged to contribute while Oracle ensures the product always meets professional quality criteria.
VirtualBox is being actively developed with frequent releases and has an ever growing list of features, supported guest operating systems and platforms it runs on. VirtualBox is a community effort backed by a dedicated company: everyone is encouraged to contribute while Oracle ensures the product always meets professional quality criteria.
Things you need to install
As I am going to show this in Windows here’s the link to Windows installer. You can download MAC or Linux installer and follow EXACTLY the same steps to install and run VirtualBox in your machine.
- VirtualBox 4.3.10 for Windows hosts x86/amd64
- VirtualBox 4.3.10 Oracle VM VirtualBox Extension Pack for All supported platforms
Extension pack provides the following added functionality:
- The virtual USB 2.0 (EHCI) device;
- VirtualBox Remote Desktop Protocol (VRDP) support;
- Host webcam passthrough;
- Intel PXE boot ROM and
- Experimental support for PCI passthrough on Linux hosts.
If you need instructions on how to install VirtualBox in your machines (may that be a Windows, Linux or MAC or Abracadabra, refer to theirUser Manual. VirtualBox user Manual is VERY detailed and specific installation instruction can be found here.
Download page: https://www.virtualbox.org/wiki/Downloads
Kali Linux
I mean if you don’t know what Kali Linux is, you wont be here!! Right? Anyhow, Kali is the Hindu goddess associated with empowerment! I’m just kidding. Kali Linux is a Debian-derived Linux distribution designed for digital forensics and penetration testing. It is maintained and funded by Offensive Security Ltd. It was developed by Mati Aharoni and Devon Kearns of Offensive Security through the rewriting BackTrack, their previous forensics Linux distribution. Say hi to Mati and Kali Dev team at www.kali.org.
You need to download the latest version of Kali Linux ISO from here.
You can also download from CDImage Page here:
I would personally suggest downloading using TORRENT and it seems more stable and less chance of data corruption.
In this guide I will outline very detailed step by step instructions on installing Kali Linux on VirtualBox where Windows 7 is the HOST operating system.
Installing Kali Linux on VirtualBox
In this guide, I will cover the followings:
- Create a new Virtual Machine
- Create a new Virtual disk (VDI, dynamic allocation etc.)
- Modifying some VirtualBox settings (allocating physical and Video memory, selecting OS Type, CPU acceleration etc.)
- Loading Kali ISO
- Booting Kali ISO (initial info, location, timezone etc.)
- Kali disk partitioning (you should try other ways than I’ve showed here to learn)
- Finalizing instllation and running Kali on VirtualBox.
- Install Virtualbox Guest Additions packages

You have two options here to follow this guide,
- You can just use the slideshow in this page and pretty much follow that..
- You can read this really long informative guide to get a better understanding of what to do
So choice is yours.
Step 1: Create a new Virtual Machine
I’ve already given instructions and provided links on how to get VirtualBox and install that above. If you’ve missed it, go back and install VirtualBox.
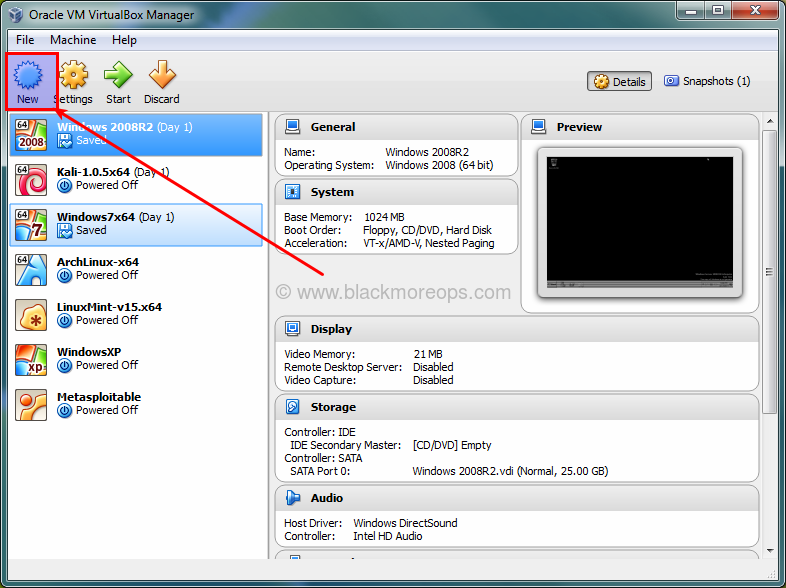
Once you’ve installed VirtualBox,
- Open it.
- Click on New to create a New Virtual Machine.
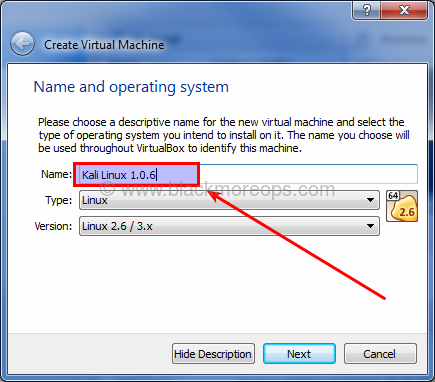
Step 1.a: Enter a name for you VBox
Enter Kali Linux 1.0.6 as the name. You’ll see Type is set to Linux automagically and version will be Linux 2.3/3.x. We will fix those later. Click Next.
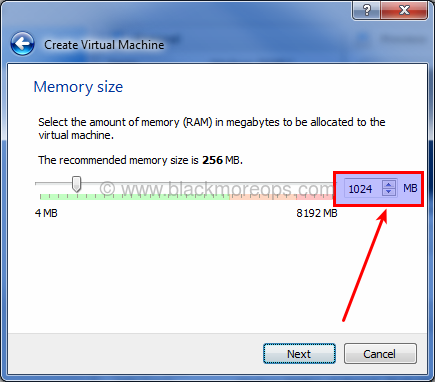
Step 1.b: Allocate Memory/RAM
Default memory size is 256 MB.
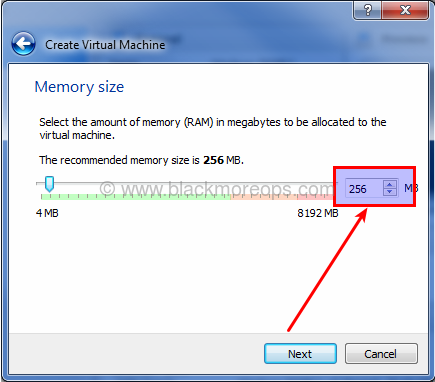
Change it to 1024 (1GB).
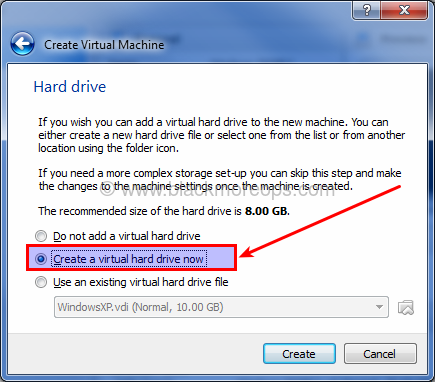
Step 2: Create a Virtual Hard Drive
In this screen select “Create a virtual hard drive now” – 2nd option and click Create.
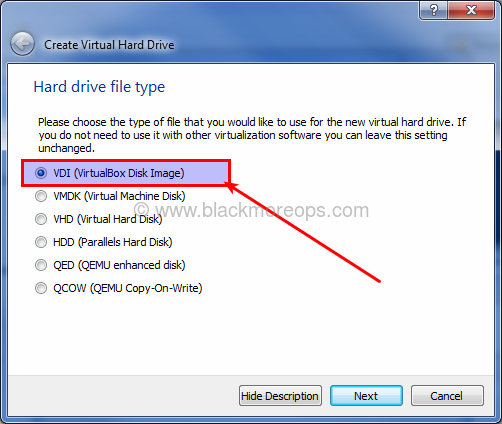
Step 2.a: Select Virtual Drive File type
On the next screen select “VDI” – VirtualBox Disk Image as your Hard Drive File Type. Click Next.
Step 2.b: Select Physical hard drive allocation type
Select Dynamically Allocated and click Next on Storage on Physical hard drive screen.
I will explain soon why we’ve chosen this.
I will explain soon why we’ve chosen this.

Step 2.c: Allocate disk size
On “File location and size” screen, it will come up as 8.00 GB as default size and Kali Linux 1.0.6 as the name (which we’ve set on step 1.a).
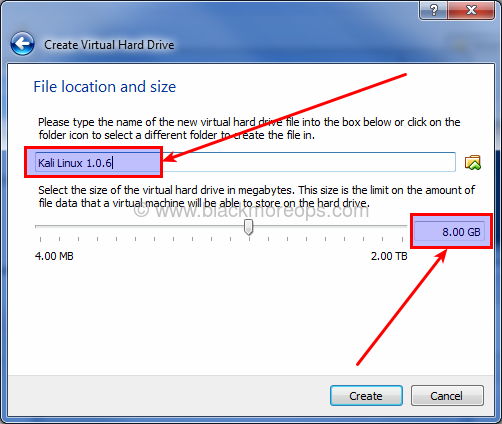
Change the Virtual Hard Drive size to 20.00 GB and Click Create.
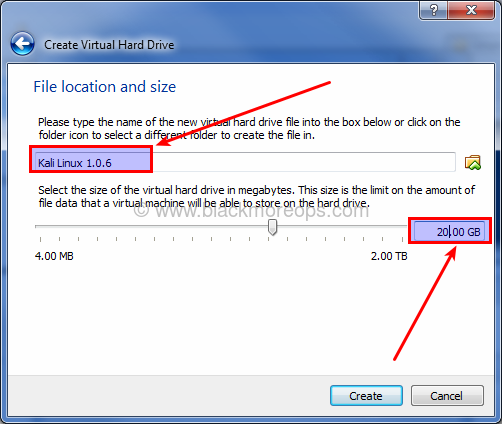
Here’s the best part.. on step 2.b we’ve selected Dynamicallt Allocated for our Storage on Physical hard drives. That means, you’re not wasting 20.00 GB disk space straight way. Usual Kali Installation install just below 5.00 GB. In this way, you will use only that much space, but your Virtual Hard Disk can increase up to 20.00 GB if you put more and more stuffs in there. An example is to downloading big dictionary files to crack WiFi passwords using Pyrit
So, yes, give it some space, it also helps avoiding some pesky installation errors.
So, yes, give it some space, it also helps avoiding some pesky installation errors.
Step 3: Modify VirtualBox settings
So far, we’ve done the followings, checklist for you:
- Created a New Virtual Machine
- Created Virtual Hard disk
- Fiddled with disk properties, type and size.
At this point you should be in the following screen. Note that I am using Kali 1.0.6 x64 bit, incase you’re using 32-bit you can change those options in here.
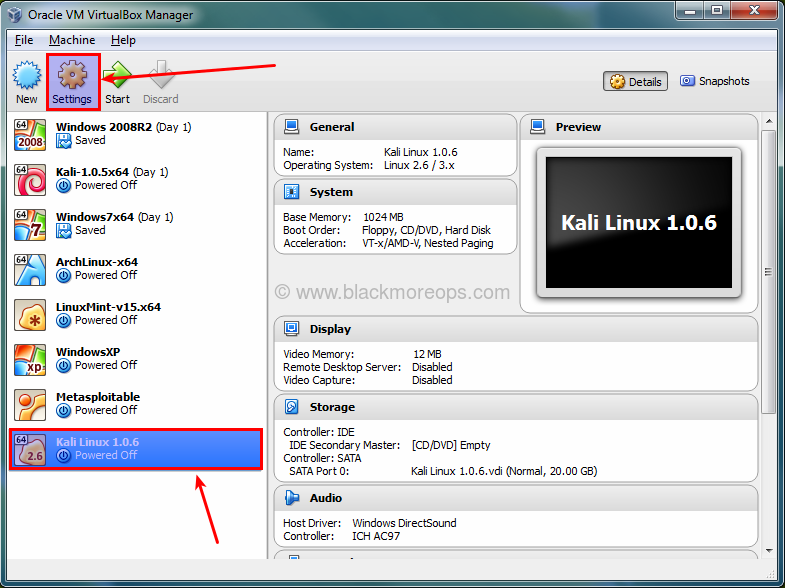
Select Kali Linux 1.0.6 (I got many), you might have just one and click on Settings icon
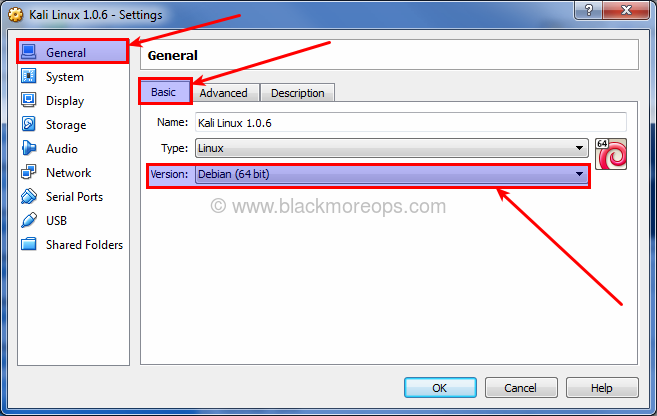
Step 3.a: Select type of OS
Depending on which ISO you downloaded you should select the correct Version here.
As Kali Linux is derived from Debian, I’ve selected Debian (64-bit) on General > Basic > Version. If you’re using a 32-bit ISO, select Debian (32-bit) as your version.
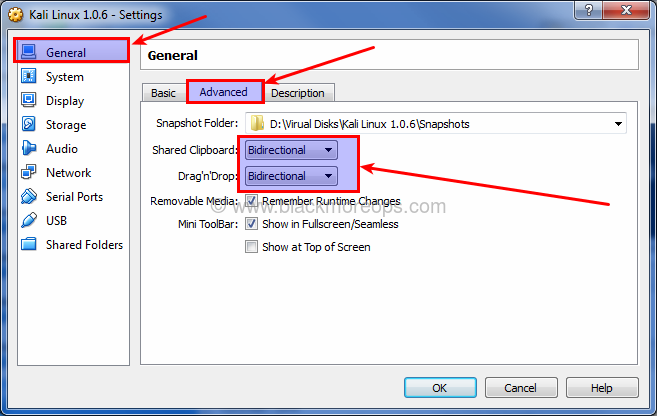
Select General > Advanced TAB and change Shared Clipboard and Dragn’Drop to Bidirectional. This will allow you to copy paste files from your HOST machine on the fly.
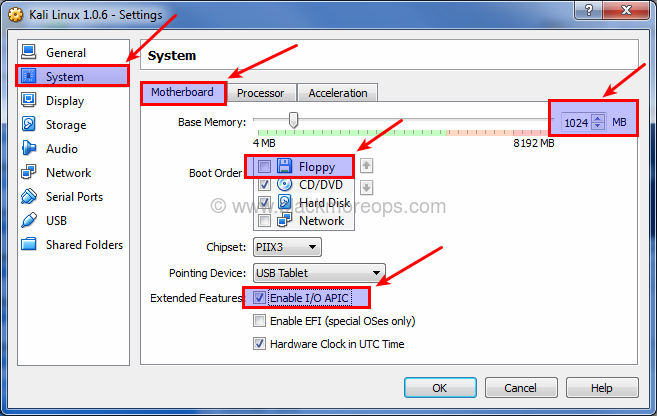
Step 3.c: Update Virtual Motherboard options
Select System > Motherboard, un-check Floppy (Do you even have a floppy disk drive anymore?) and Check the box for “Enable I/O APIC”. Note that you can change base memory allocation in the same screen. We’ve set it to 1024MB previously. My PC got 8.00GB RAM, which means I can actually allocate a lot more to make Kali response faster on my Virtual Machine. If you feel your Virtualized Kali Linux is slow, you should increase this Base Memory allocation.
The calculations are as follows:
1.00 GB = 1024MB
2.00 GB = 2048MB
3.00 GB = 3072MB
2.00 GB = 2048MB
3.00 GB = 3072MB
You get the idea, just multiply 1024 with the amount of Memory / RaM you want and put the value in here.
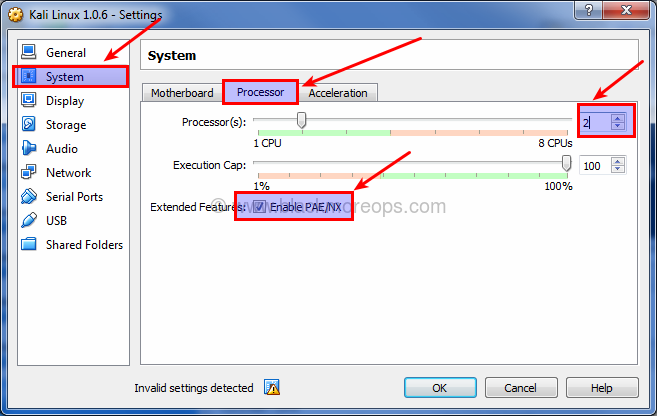
Step 3.d: Select number of Processors and enable PAE/NX
I’ve changed Processor to 2 (I got 8 CPU’s in my machine, this screen will show how many you got). Try sticking with EVEN numbers here.
Check the box for “Enable PAE/NX”.
Step 3.e: Allocate Video memory and 3D acceleration
Select Display > Video and set Video Memory to 128MB. This allows you have a good responsive desktop environment.
Also check the box for “Enable 3D Acceleration”.
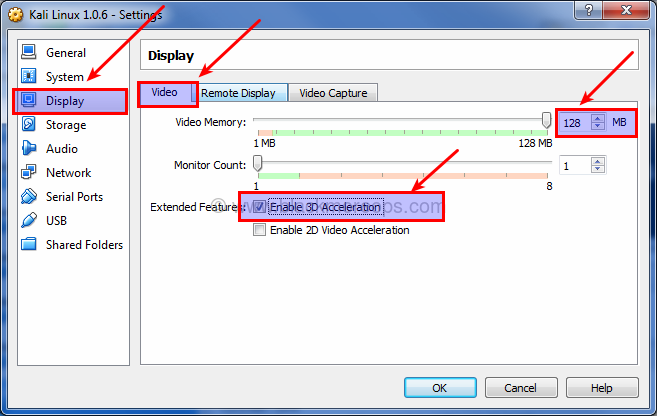
If you got more than 1 Monitor, you can change your settings here too.
Step 4: Loading Kali ISO
Select Storage > Controller: IDE and highlight Empty CD ICON. Now on your right, you should be able to use the little CD ICON (it should be CD/DVD Drive: IDE Secondary Master already, if not change it) and select your downloaded ISO.
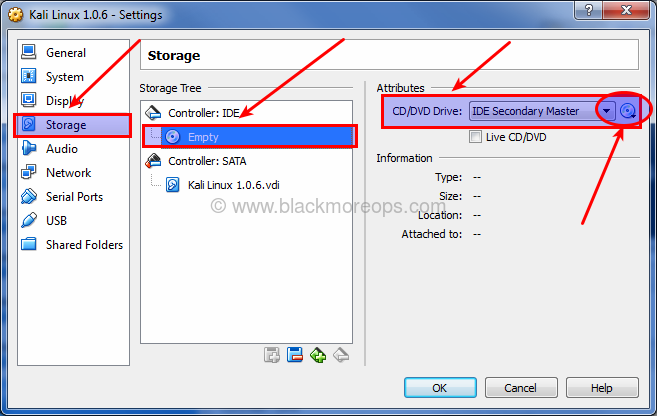
Once you select your downloaded ISO (in my case, it’s kali-linux-1.0.6-amd64.iso). See the properties and information’s changes accordingly.
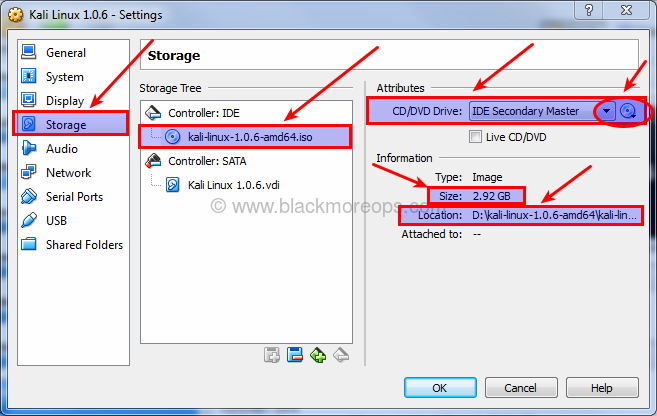
Important thing to note: Size… if your disk size mismatched, you might have a corrupt disk. Refer to Kali download page and CDimage page for size related info. You can also do a SHA1 check to ensure your disk is not corrupted. More info here.
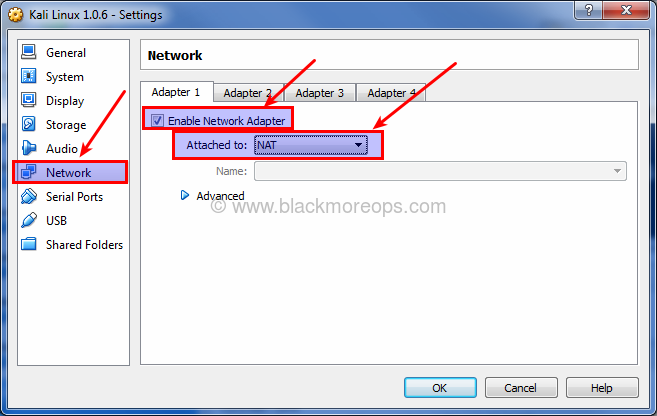
Step 4.a: Select Network connection type
If your computer is connection to internet, select NAT on Network > Adapter 1. You can enable more network adapters if you feel like to play around.
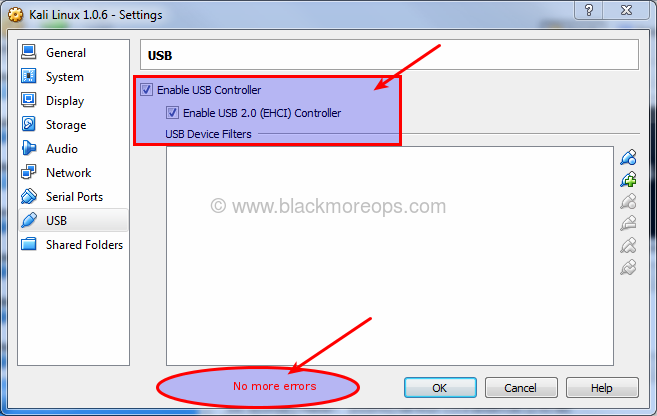
Step 4.b: Enable USB 2.0 Controllers
From USB TAB, check the boxes for Enable USB Controller > Enable USB 2.0 (EHCI) Controller. Note that I got “Invalid settings detected” error at the bottom of the screen. Install VirtualBox Extension Pack to remove this error.

You need to PRESS OK and save your Settings first.
Close VirtualBox and then install VirtualBox 4.3.10 Oracle VM VirtualBox Extension Pack for All supported platforms.
It will enable virtual USB 2.0 (EHCI) device support, VirtualBox Remote Desktop Protocol (VRDP) support, Host webcam passthrough support.
Re-Open VirtualBox and Select Settings > USB again to confirm you don’t have that error anymore. Save your settings by pressing OK.
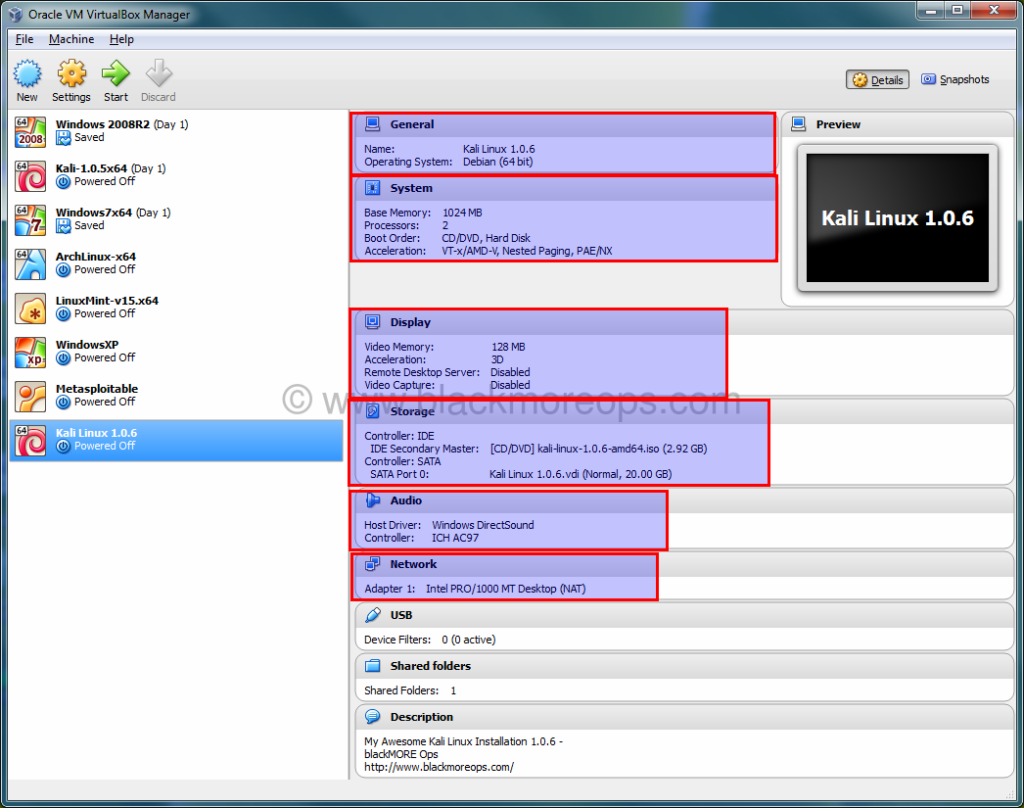
Step 4.c: Compare settings with mine
At this point your screen should be somewhat similar to mine. I’ve highlighted the imporatnt parts, if something didn’t match you can go back and enable disable those settings. Note that, for 32-bit users, it will be slightly different.
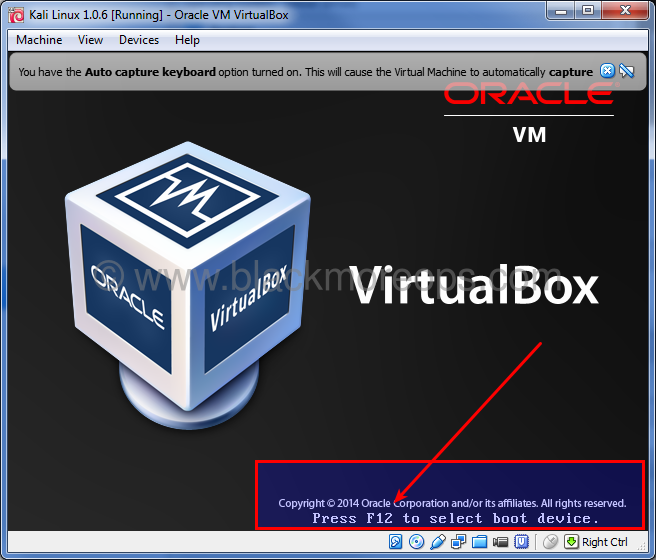
Step 5. Booting Kali ISO
From VirtualBox Main Screen, Highlight Kali Linux 1.0.6 and Press Start Button. You might want to press F12 on the following screen to play around.
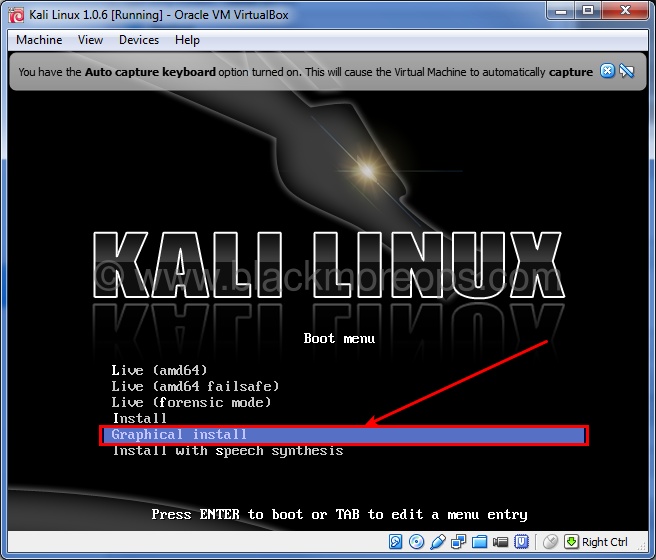
Step 5.a: Select Graphical Install
On Kali Linux Boot menu, highlight Graphical install and press Enter.
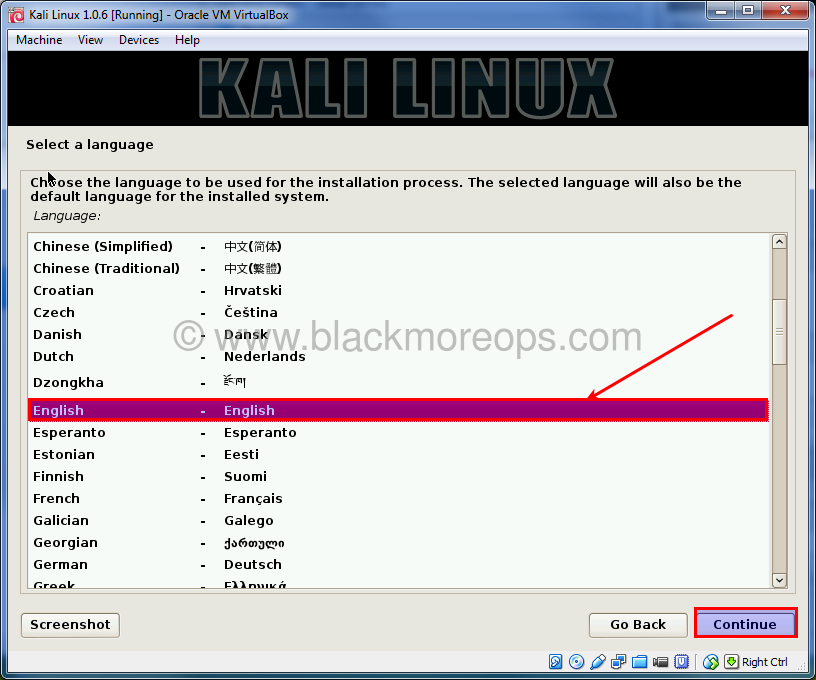
Step 5.b: Select language
In my case I’ve chosen English. Click Continue.
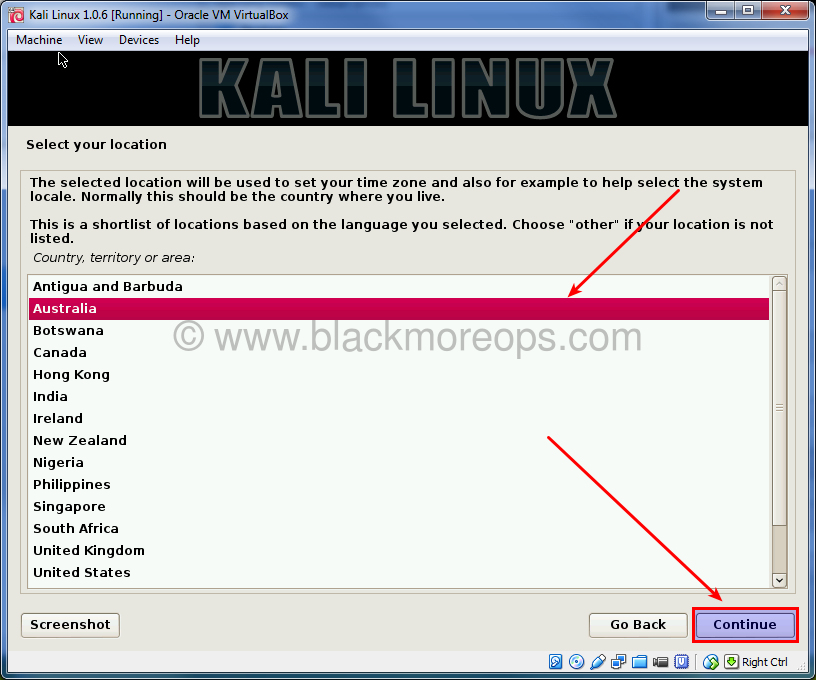
Step 5.c: Select location
In my case I’ve chosen Australia. Click Continue.
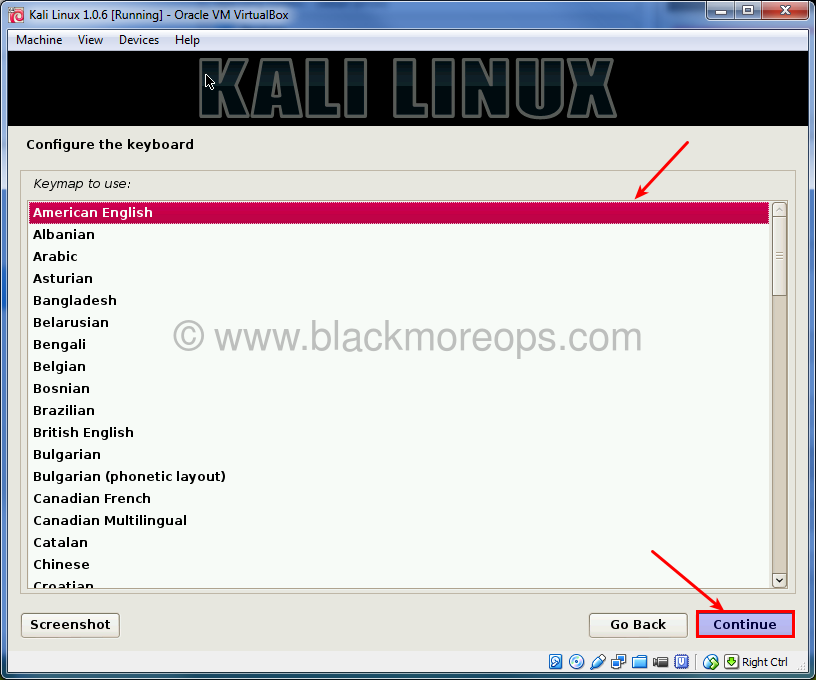
Step 5.d: Select keyboard layout
I’ve selected American English. Click Continue.
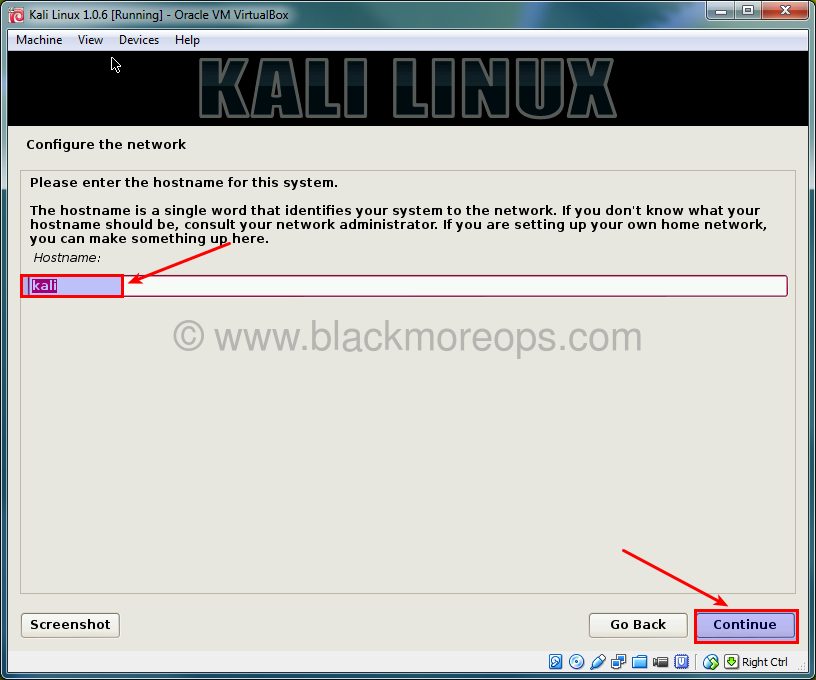
Step 5.e: Enter Hostname
You can enter any name in here. I’ve left the default hostname as “kali”. Click Continue.
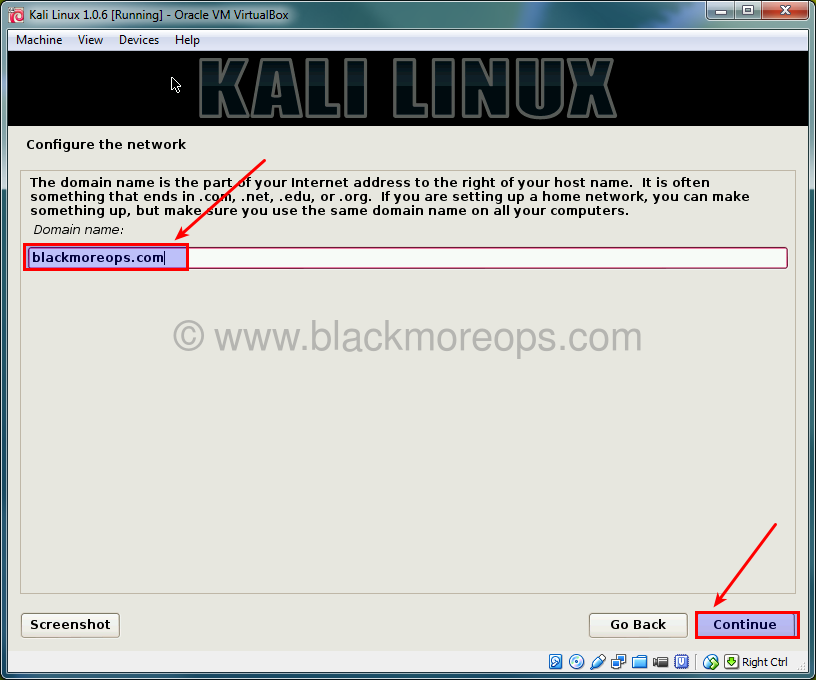
Step 5.f: Enter Domain name
You can leave it blank if you want. I’ve chosen blackmoreops.com as my domain name. This means I can later ping my computer as kali.blackmoreops.com in my LAN.
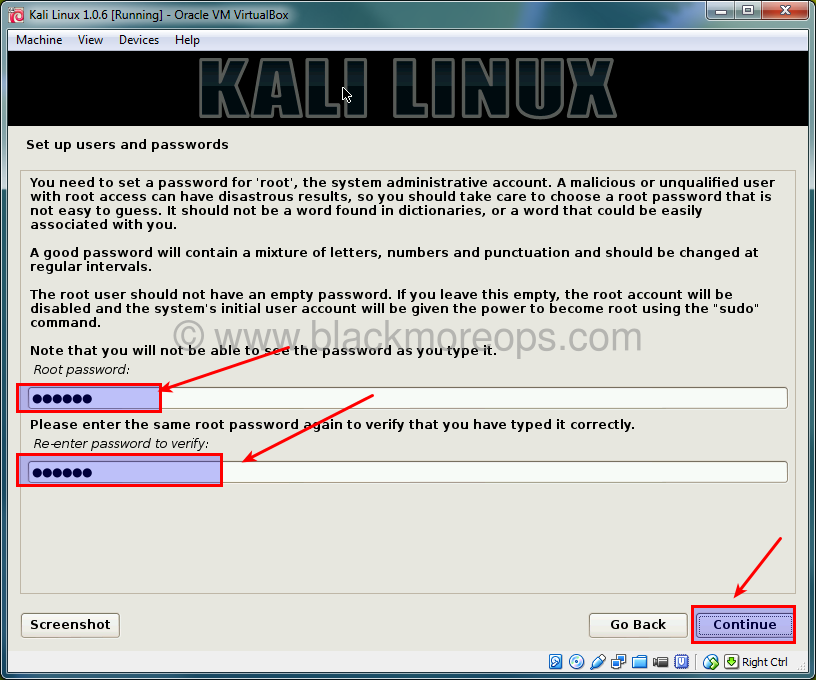
Step 5.g: Choose Root password
Enter your root password (anything you choose), confirm and Click Continue.
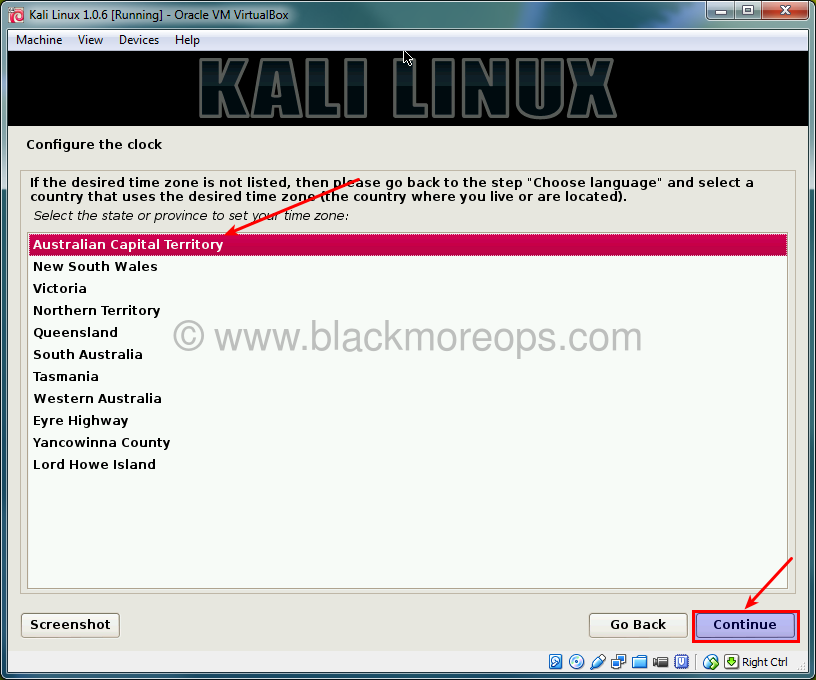
Step 5.h: Configure Clock
Usually you should choose the correct State or province here as otherwise Kali will try to connection incorrect repository and you get slower download speed. Same applies for Location in Step 5.c.
Step 6: Kali disk partitioning
As this is all Virtualized, you can choose anything you want to. I personally think you should play around in this screen to get familiar with how Disk partitioning works. Disk partitioning usually scares the hell out of new users and you are potentially at risk of loosing Data. In VirtualBox environment however, go NUTS!
For the sake of this guide, I will choose the most basic Partitioning method.
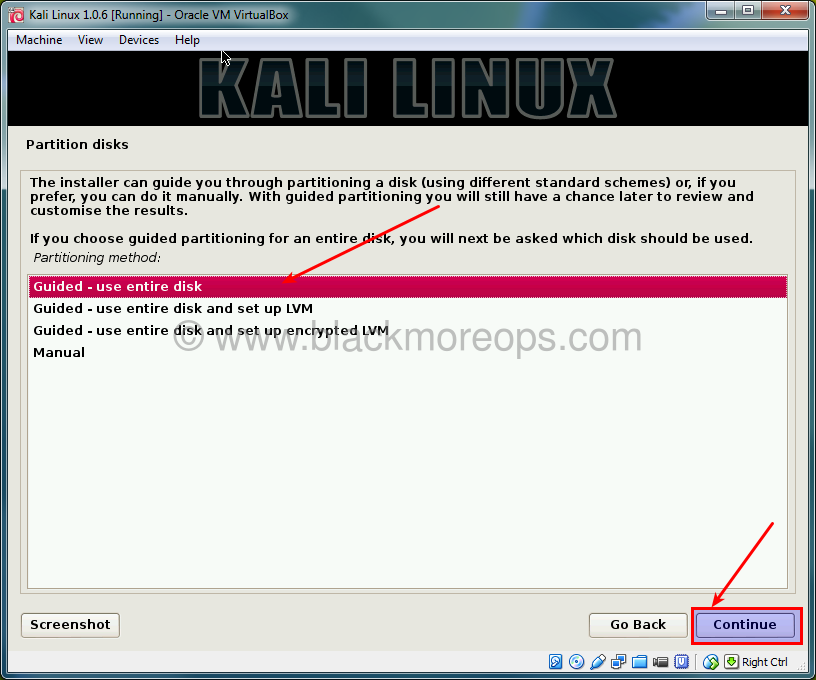
Step 6.a: Choose Partitioning method
Highlight Guided – use entire disk and Select Continue
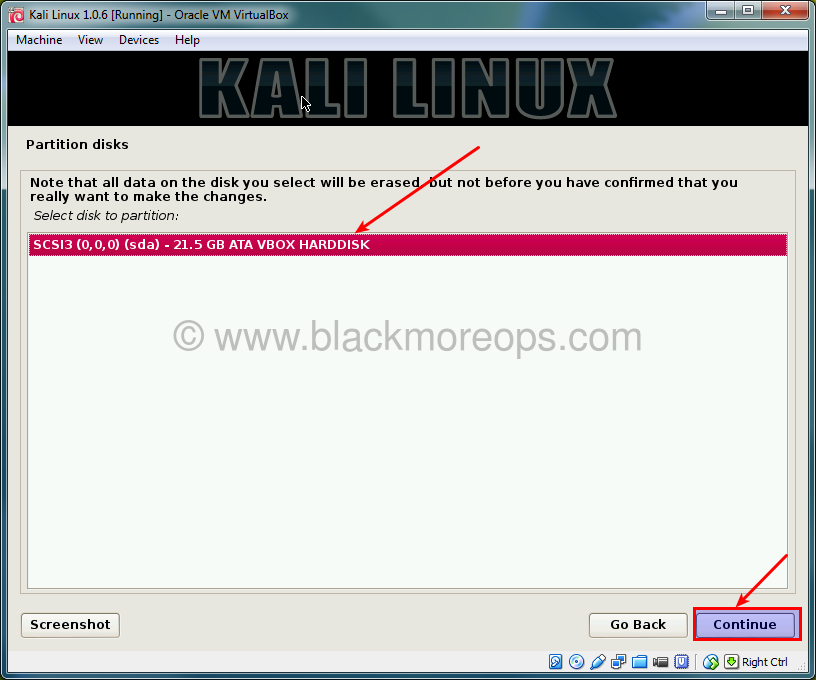
Step 6.b: Select disk to partition
You should have only 1 disk in this screen, highlight it and click Continue.
Step 6.c: Select partitioning scheme
Highlight “All files in one partition” and click Continue.
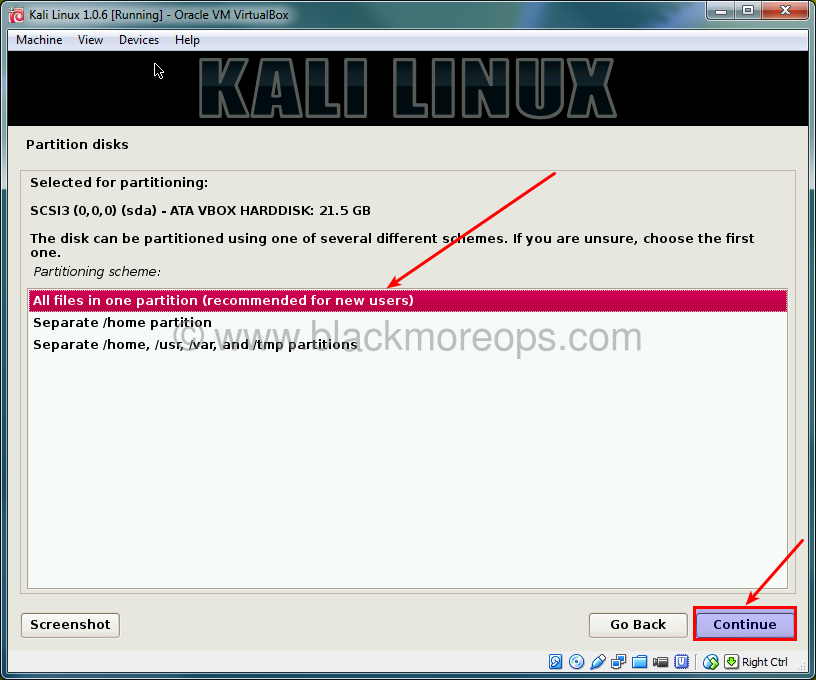
You might want to play around in this screen if you feel like. This is a good thing to learn as in corporate environment, you select disk scheme manually.
I will advise you to read Redhat’s Recommended Partitioning Scheme for a better understanding.
Step 6.d: Finish partitioning
On the next screen, Highlight Finish partitioning and white change to disk and click Continue.
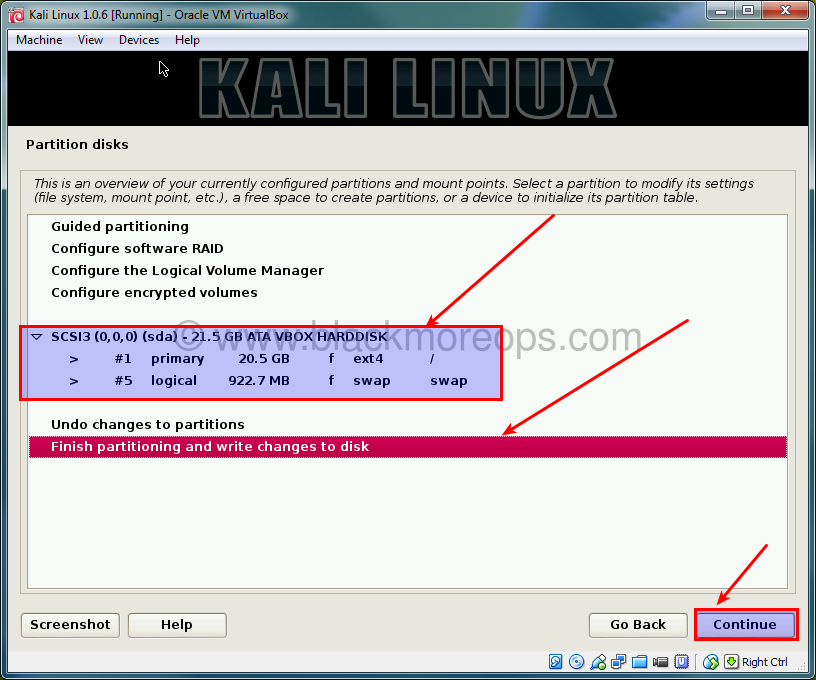
Note that how the partitioning is done. Click Continue when you’re satisfied.
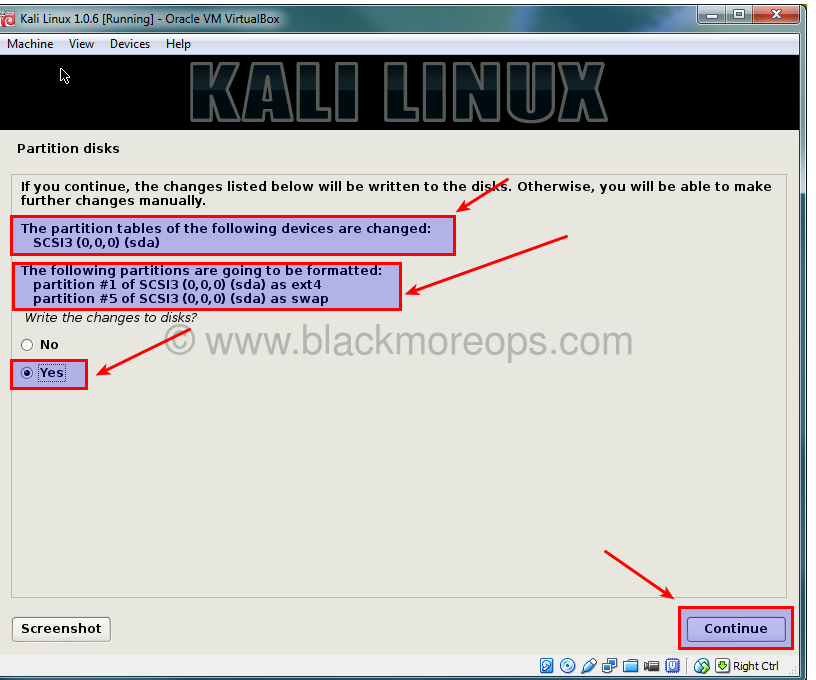
Finally, on the next screen, highlight “Yes” and click Continue to write changes to disks.
Your installation will start now. On my PC which got a 5400 RPM Hard disk, it takes about 8 mins.
Step 7: Finalizing installation and running Kali on VirtualBox.
If your HOST machine is connected to Internet, you can update your installation of Kali Linux on VirtualBox by selecting to “Use a Network mirror?”
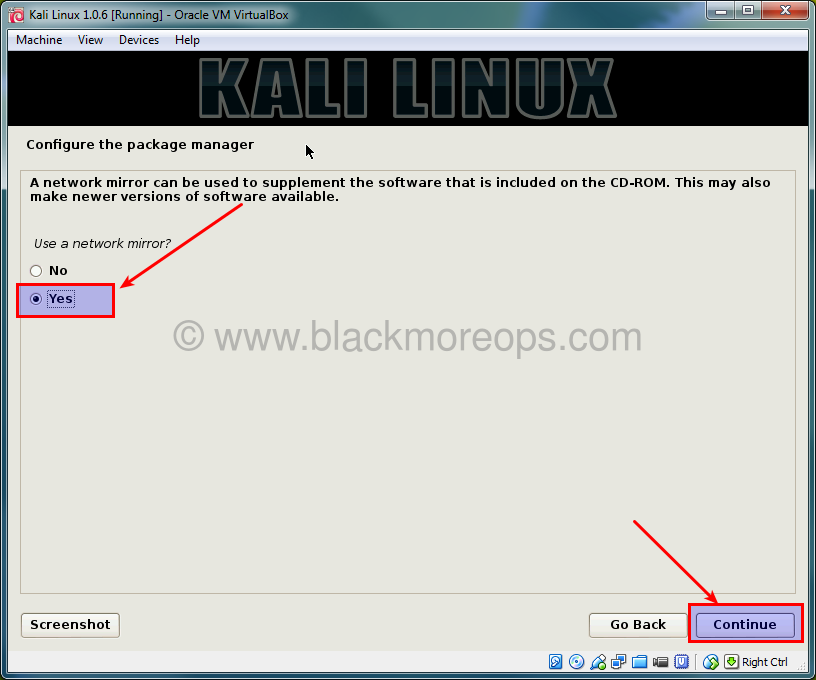
On this screen select Yes if you want to update, select No, if you want to do it later. I suggest updating as Kali Linux updated a lot of packages since Kali Linux 10.0.6 was released. This might take sometime, but it’s better this way. Note that it might take anytime between 1-2 hours.
You can always update Kali installation later on. Click Continue when ready.
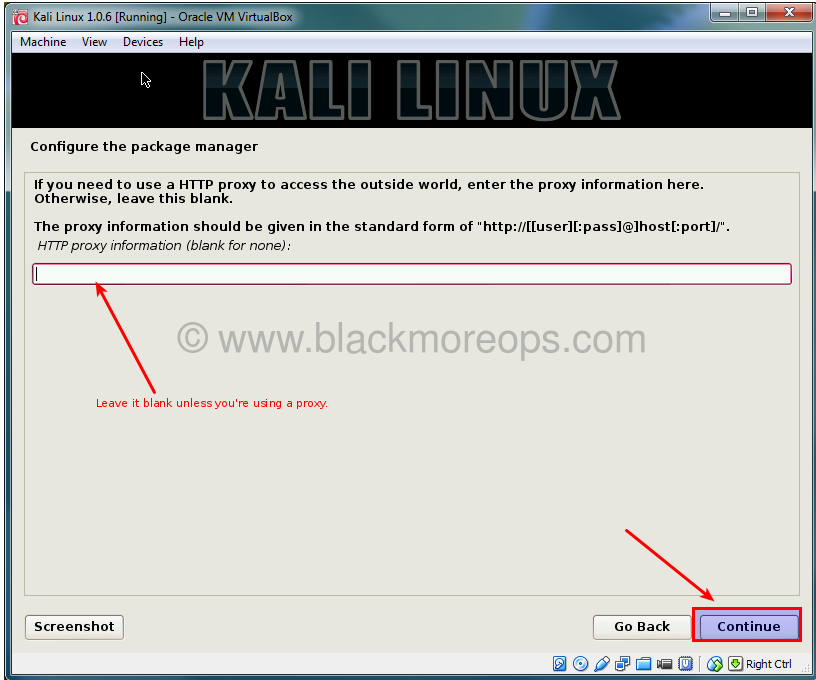
Step 7.a: Provide HTTP Proxy information
If you’re behind a proxy, type it in here, if you’re directly connected to internet, leave it blank and click Continue.
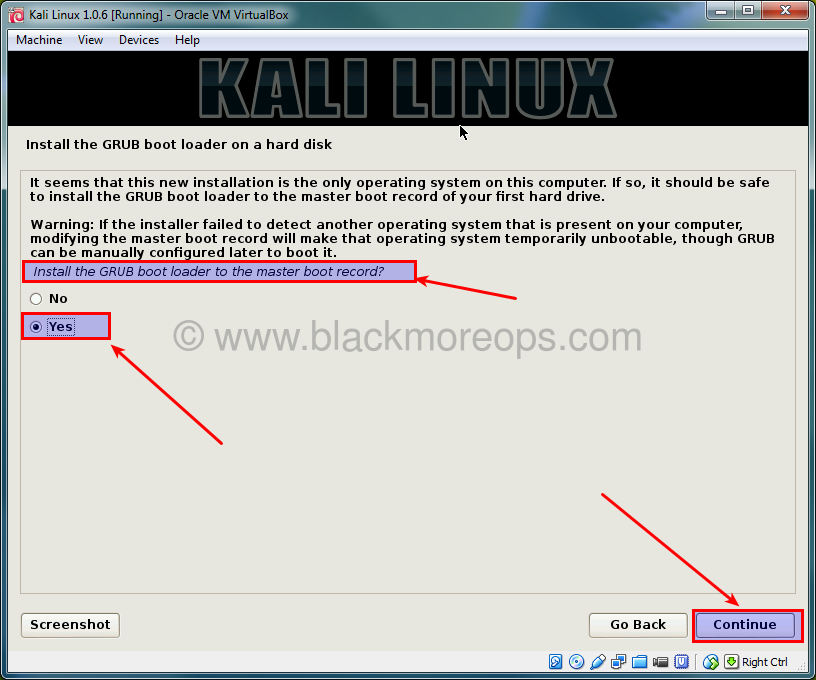
Step 7.b: Install GRUB boot loader
Select Yes to install grub boot loader on the next screen. Press Continue when ready.
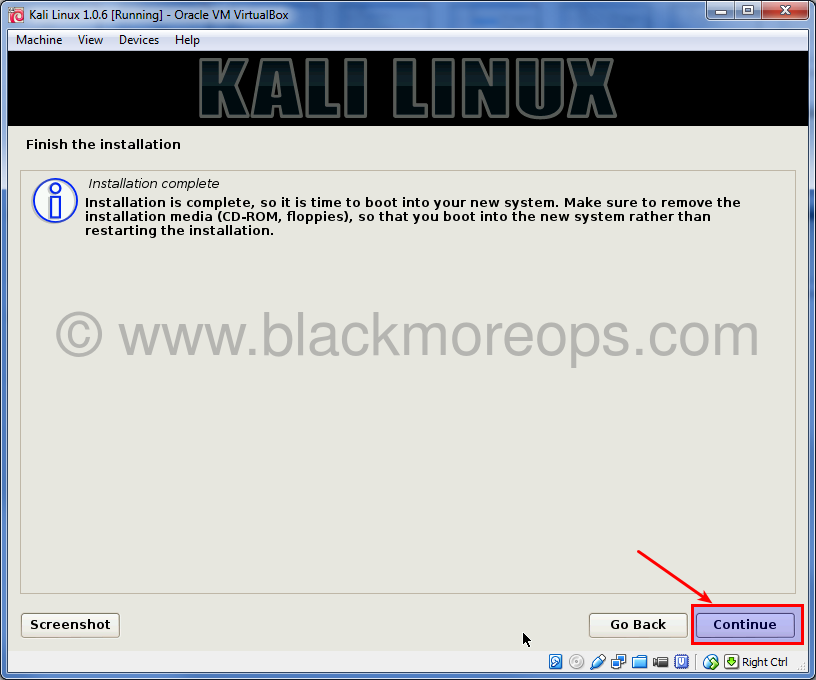
Step 7.c: Reboot time!
Once the installation has finished, press continue and the system will reboot.
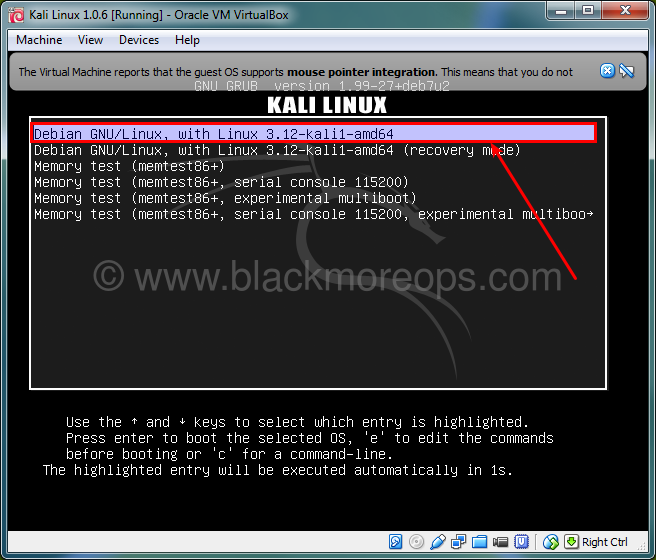
Step 7.d: Choose Kali on Grub
This screen explains itself. You choose the first option and press Enter. You can choose Recovery mode to play around if you’ve messed something on Grub or system config for recovery.
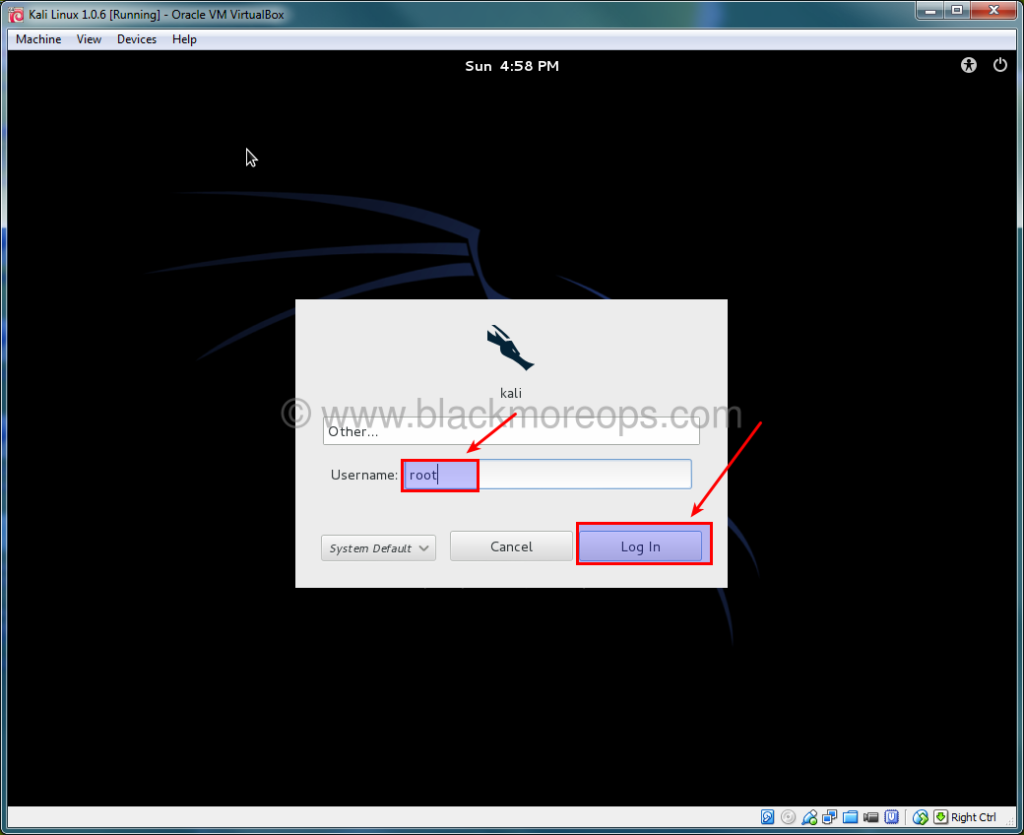
Step 7.e: Login for the first time
Click on Other and enter root as your username.
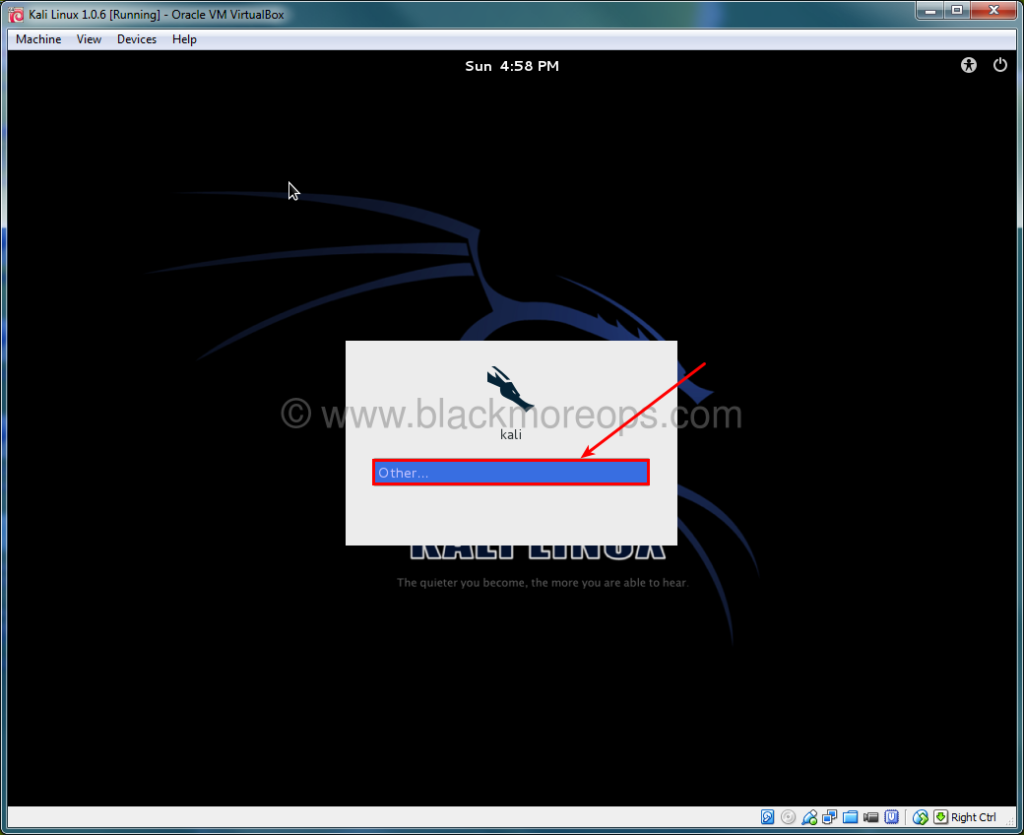
Type in the password you’ve selected on step 5.g. Click Log In when ready.
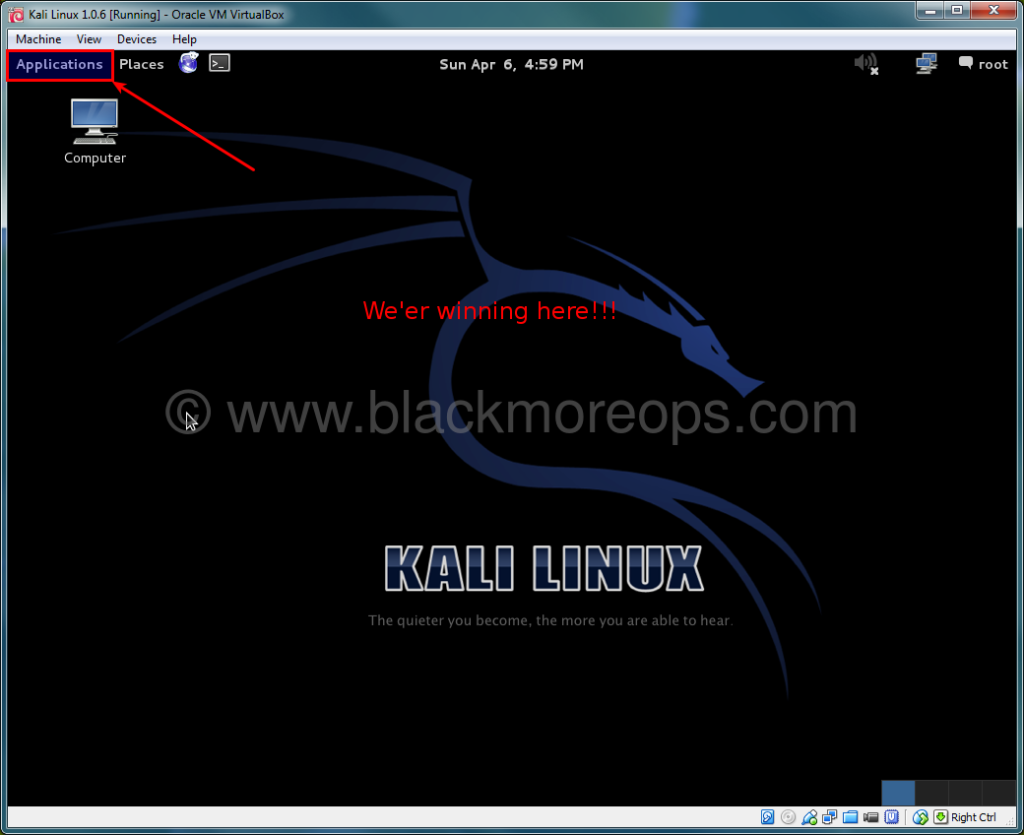
Step 7.f: Your Kali Desktop
Now you’re logged into Kali Linux on VirtualBox. Click on Applications Menu to see more.
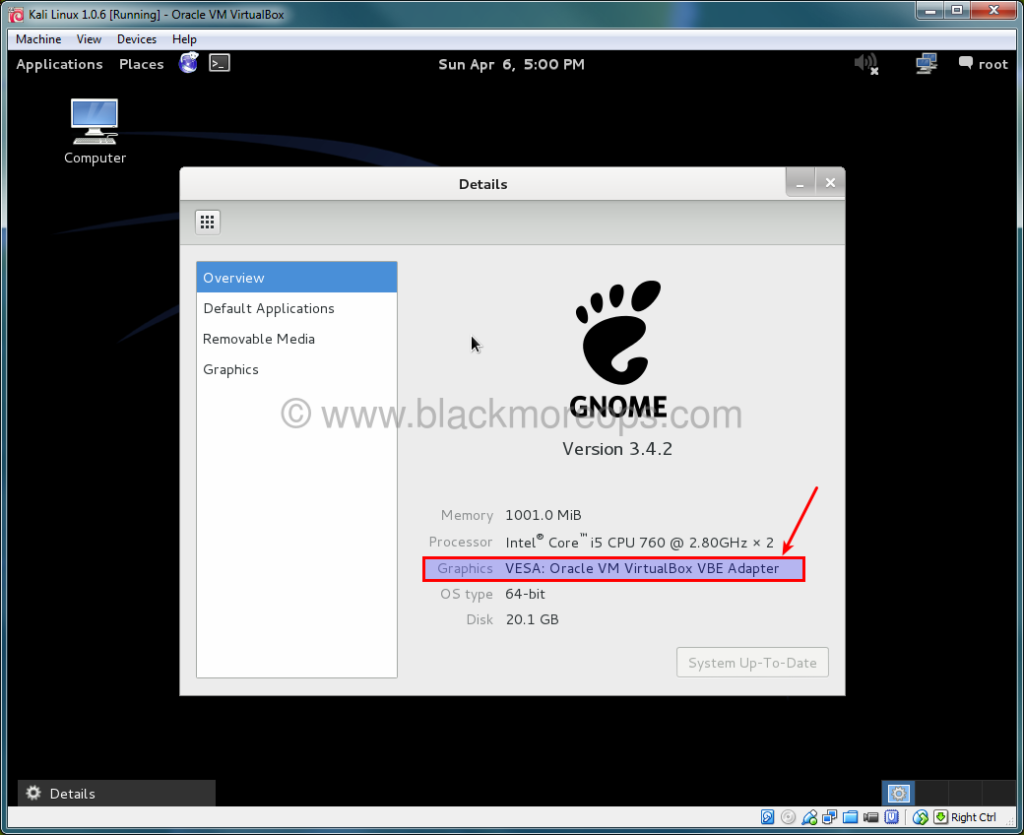
Note: Kali uses VESA: Oracle VM VirtualBox VBE Adapter as your Graphics card. This is a Virtualized instance of Graphics card.
Step 8: Install Virtualbox Guest Additions packages
Now that you’ve installed Kali Linux on Virtualbox, you need to install from Virtualbox Guest Additions packages. Guest Additions are designed to be installed inside a virtual machine after the guest operating system has been installed. They consist of device drivers and system applications that optimize the guest operating system for better performance and usability. This enables the follows for you:
- Mouse pointer integration
- Shared folders
- Better video support
- Seamless windows
- Time synchronization
- Shared clipboard
Without installing VirtualBox Guest Additions package, you screen will be 1024×768 or lower resolution and you wont be able to make Kali run in full screen, leverage any of the shared clipboard functionality.
Step 8.a: Mount VirtualBox Guest Additions drive
From device menu on your VirtualBox, click on Install Virtualbox guest additions option (while you’re running Kali Linux) and you’ll see a CD/DVD drive is mounted.
Step 8.b: Copy and install the package
Copy the VBoxLinuxAdditions.run file from the drive to the root directory using following command
cp VBoxLinuxAdditions.run /root/Make it executable:
chmod 755 /root/VBoxLinuxAdditions.runInstall it:
./VBoxLinuxAdditions.runOnce you’ve installed VirtualBox Guest Additions package, reboot Kali Linux.
Now you will have Kali Linux running on full screen.
Conclusion
THAT WAS A LONG GUIDE. Thanks for reading. If you’ve found it useful, please share. Comment if you need help or discuss options.