How to use ettercap

Ettercap is a comprehensive suite for man in the middle attacks. It features sniffing of live connections, content filtering on the fly and many other interesting tricks. It supports active and passive dissection of many protocols and includes many features for network and host analysis.
Ettercap works by putting the network interface into promiscuous mode and by ARP poisoning the target machines. Thereby it can act as a 'man in the middle' and unleash various attacks on the victims. Ettercap has plugin support so that the features can be extended by adding new plugins.
How to do ARP Poisoning with ettercap
In this Article we will Learn:
- How to use ettercap-graphical
- How to do ARP Poisoning
- How to get remote visited URLs
1. Before starting ettercap we need to do some edit on its configure file.
Go to Computer → File System → etc → etter.conf

(Click on image for large view)
2. Right click on etter.conf file and Click on Open with leafpad

3. Carefully remove ‘#’ symbol from the iptables paragraph.

4. As you can see we have removed ‘#’ symbol so now save this file.

5. Now open ettercap-graphical
A. GUI Method
Appication → Kali Linux → Sniffing Spoofing → Network Sniffers → ettercap-graphical


6. Go to Sniff and click on Unified sniffing

7. Select your Network Interface (here my interface is eth0) and click OK

8. Go to Hosts and Click on Scan for hosts – This will scan hosts which are alive in your network.

9. Go to Hostsand click on Hosts list – It will show you all hosts which are alive in your network

10. Here you can see we got 4 alive hosts in the network. You must need to add your default gateway IP for doing successful poison in your target. You can find out default gateway IP by using netstat –rn command on terminal.

11. Select Default Gateway IP and Click on Add to Target 1

12. Again Select Target PC’s IP and Click on Add to Target 2

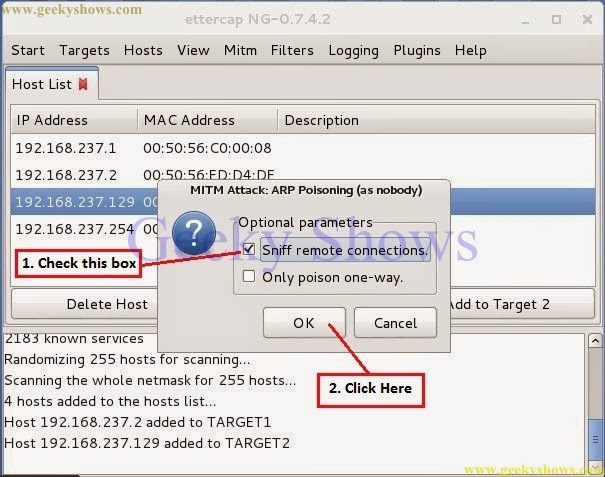
13. Go to Mitm and Click on Arp Poisoning – It will start poisoning to Target Host.

14. After Clicking on Arp Poisoning You will a pop up. In this pop up kindly check sniff remote connections box and click OK.
15. Go to Targets and Click on Current Targets. – It will show your Current Targets.

16. After Clicking on Current Targetsyou will see this window. In this window as you can see you have two current targets.

17. Go to Start and Click on Start sniffing – It will start sniffing your target hosts.

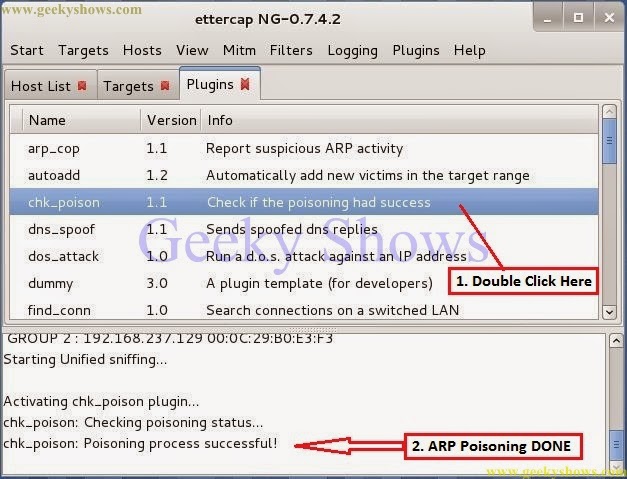
18. Go to Plugins and Click on Manage the Plugins – It will show you all type of plugins.

19. Find out chk_poison from the plugins list and double click on it. After sometime as result you will see a message on bottom of the window Poisoning Process Successful. It means you have successfully done poisoning on your target.
20. Now, I am going to show you one other plugin who sends your targets visited URLs. If you will apply this plugin in your target. You can see which websites he is surfing right now. As you can see in bottom of this window it is showing “REMOTE COMMAND: Mozilla-remote openurl(http://www.google.co.in) etc. It is just because my target pc is surfing www.google.co.in in his browser.

21. This was our target pc and here I was searching www.google.co.in .

(Click on image for large view)
Note – If you want to play with ettercap then try to apply all plugin one by one on your target with some research.
Like it ? Share it.
