How to Make a Custom LCD from Scratch
If you have ever wondered what it took to make your own custom graphic LCD from scratch, this video from [Applied Science] is worth a watch. It’s concise and to the point, while still telling you what you need to know should you be interested in rolling your own. There is also a related video which goes into much more detail about experimenting with LCD technology.
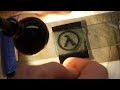
[Applied Science] used microscope slides and parts purchased online to make an LCD that displays a custom graphic when activated. The only step that home experimenters might have trouble following is coating the glass slides with a clear conductive layer, which in the video is done via a process called sputtering to deposit a thin film. You don’t need to do this yourself, though. Pre-coated glass is readily available online. (Search for Indium-Tin Oxide or ‘ITO’ coated glass.)
The LCD consists of a layer of liquid crystal suspended between two layers of conductive glass. An electrical field is used to change the orientation of crystals in the suspension, which modulate the light passing through them. Polarizing filters result in a sharp contrast and therefore a visible image. To show a particular shape, some of the conductive coating is removed from one of the layers in the shape of the desired image. The process [Applied Science] uses to do this is nearly identical to etching a custom PCB.
Parts of LCD technology can be quite hackable. Neither of these videos are brand-new, either. Have any of you taken on the challenge of DIY LCD displays? We’ve seen experiments with electrochromatic glass using old LCD displays, as well as experiments in playing with polarized light to hide secret messages on LCD screens.
Thanks to [Samuel A. Falvo II] for the tip!
Filed under: how-to

from Hackaday http://ift.tt/1ZXsWGf
via IFTTT