How to create video in just 30 minutes | villu 2017
How to create video in just 30 minutes
To create your movie or slideshow, you don’t need to set aside a whole lot of time to study complicated software. With Movavi Video Editor, you can create a quality short video clip in just 30 minutes. The instructions below describe the main steps in creating a movie or slideshow. In Movavi Video Editor, you can:- split videos into parts and cut out unwanted segments
- apply artistic effects to video and stills
- insert smooth transitions between video clips and stills
- add titles to the beginning and end of the movie, overlay titles on video
- add a soundtrack to your movie
- save the finished video for viewing on your preferred device or prepare it for uploading to the web
Step 1. Add Media Files to the Program
First, open the files you want to work with. To do this, click the Add Media Files button, locate the desired photo, video, and audio files on your PC, and click Open. The files you’ve uploaded will be automatically added on the Timeline at the bottom of the program window.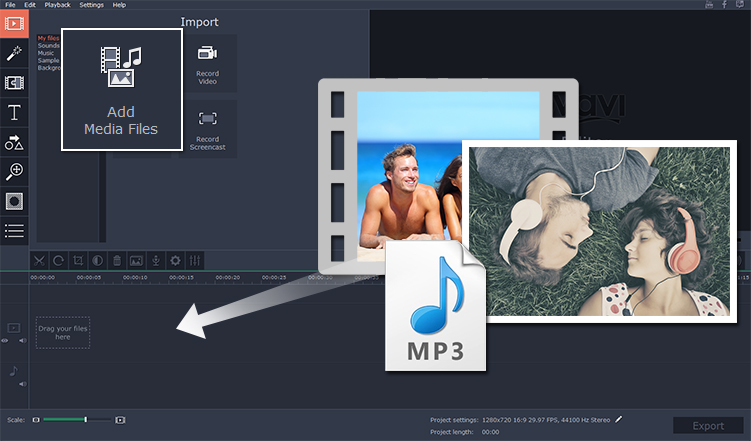
Step 2. Split Video into Parts, Delete Unwanted Segments
To start editing a video fragment, select it on the Timeline. Then set the red marker to the position where you want to cut the clip. After that click the Scissors icon to split the video into two parts. To remove an unwanted segment, select it and click the Wastebin icon or just press Delete on the keyboard.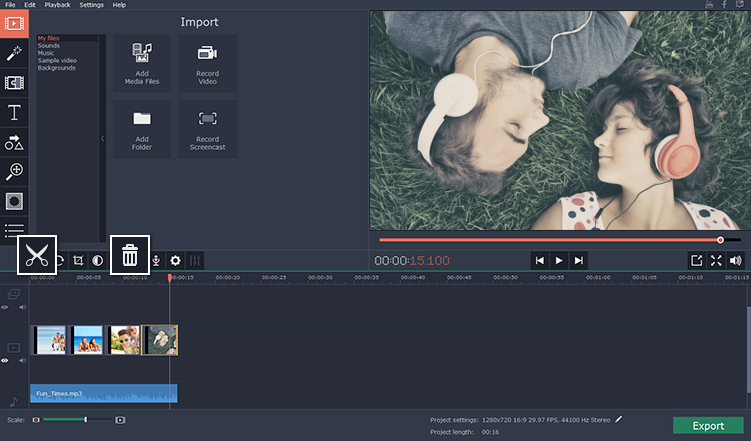
Step 3. Apply Artistic Effects to Videos and Photos
Click the Filters button and you’ll be taken to the Effects Gallery, with more than 50 professional video effects and filters. Click the icon for the effect you’d like to try, and you’ll see a preview of how it will look when applied to your video clip or picture. To apply the effect to the clip drag it onto the target fragment on the Timeline.
Step 4. Join Fragments with Smooth Transitions
Click the Transitions button to see the list of available transitions. To preview the fades, click the icons for the transitions you’re interested in. Choose the transition you want, drag it to the Timeline and place it between the two clips or photos you want to link.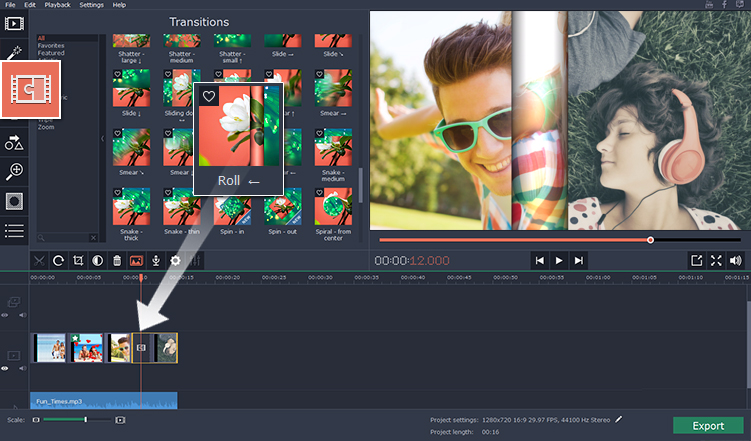
Step 5. Add Titles
Click the Titles button, and you’ll see a list of ready-made title styles. As with the effects and transitions collections, each title style has its own demo. Just drag the desired title on the Timeline and it will appear on a separate Titles track. Double-click on the title to type your text and set the desired parameters for it.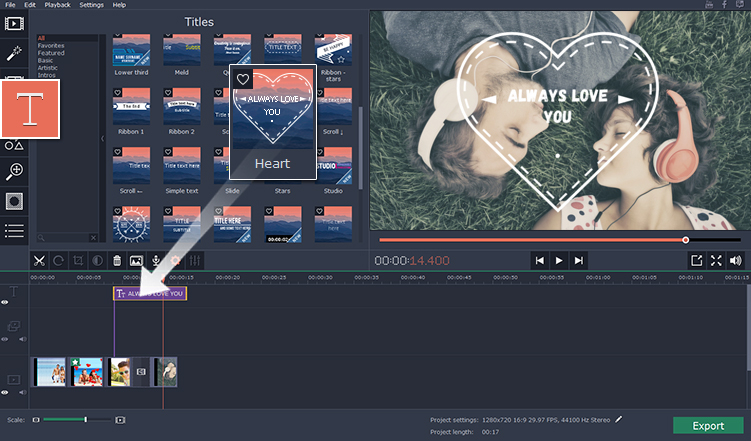
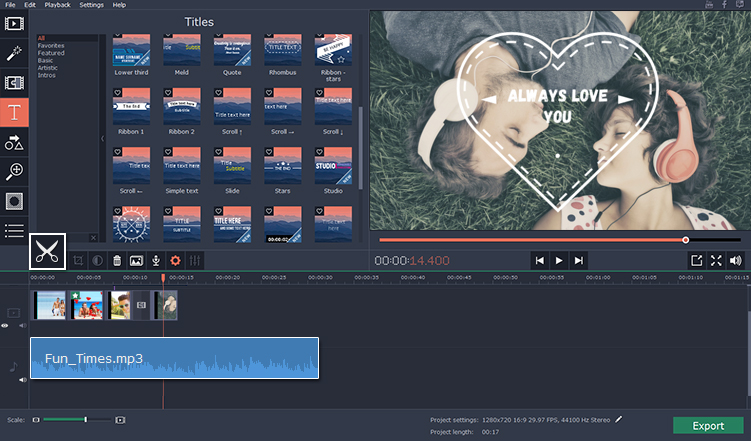
Step 6. Adjust the Audio Track
It is likely that the length of the video and the audio tracks will differ in one of two ways:The music is longer than the video. Click the audio file on the Timeline, drag the red cursor to the end of the video track and click
The video is longer than the audio. “Loop” the music playback: add several copies of your audio file to the audio track by dragging it to the Timeline as many times as needed, then cut the excess audio at the end.
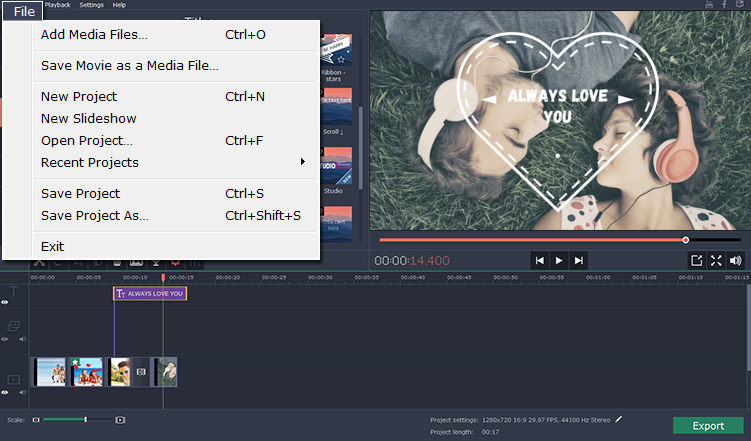
Step 7. Save Your Movie Project
Don’t forget to save the movie project you’re working on. You may need the project later if you want to change something in your video or just save it in another format.Choose Save Project As from the File menu. Specify the folder where you want to save the project file and enter the file name, then click Save.
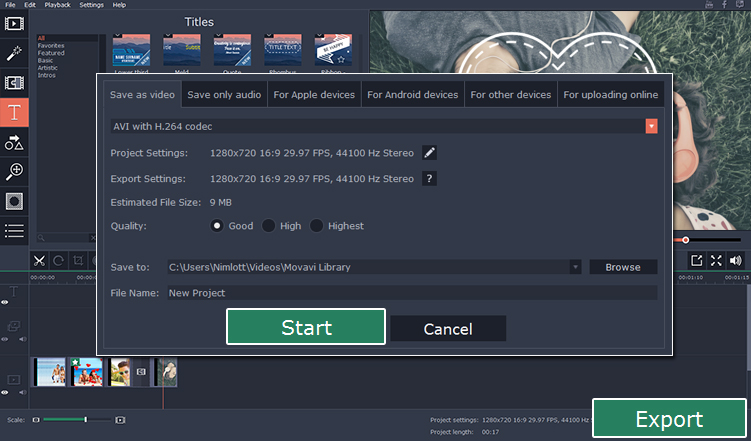
Step 8. Export the Finished Video
Now your movie is ready for viewing. All you need to do is to save it in the most appropriate format. Click the Export button and choose the desired export option. To save video for watching on your PC or mobile device, choose the appropriate format or preset in the new window and click Start. After the conversion is complete, the folder containing the finished video will open automatically. Now you can watch your video on any media player.