How to Setup Web Page Test Private Instance Ubuntu 16.x
Web Page Test (WPT) :-
Web Page Test is an awesome tool to check website performance and loading time from different geographical locations.
Web Page Test also available publically and it's open source, free to test website loading time.
We can set up our private instance to run the test and can enable script for automation test.
System Requirement:-
We required Two working PC to set up private WPT instance.
1- WPT Server, In my case, I am using Ubuntu 16.04
2-One Windows PC where we need to install browser i.e. Chrome, IE, Mozilla etc..
Step 1- Configure WPT web server
The Web Server can be any that support PHP scripts, I am using Ubuntu 16.04.
Required Software packages on Ubuntu Server
A- Apache or Nginx with following modules
o- mod_expire
o- moe_headers
o- mod_rewrite
B- PHP 5.3 or any later version with following modules.
o- php-gd
0- php-zip
o- php-zlib
o- php-curl
o- php-sqlite
C- FFMPEG
o- Make available in the path (used to extract video thumbnail images)D- Imagemagick (optional)
o- Necessary for mobile video processing if using the mobile Node.js agent
E- Jpegtran (optional)
o- Make available in the path (used for displaying jpeg analysis)
F- ExifTool (optional)
o- Make available in the path (used for displaying jpeg analysis)
Step 2- Install All required software packages.
A- Install Nginx using below command.
root@U16:~# apt install nginxStart Nginx server using below command
root@U16:~# systemctl restart nginxB- Install PHP using below command
root@U16:~# apt install php7.0-fpmInstall PHP all required modules using below command
root@U16:~# apt-get install php7.0-mysql php7.0-zip php7.0-curl php7.0-gd php7.0-intl php-pear php-imagick php7.0-imap php7.0-mcrypt php-memcache php7.0-pspell php7.0-recode php7.0-sqlite3 php7.0-tidy php7.0-xmlrpc php7.0-xsl php7.0-mbstring php-gettext php-apcu
Start php7.0-fpm service using below command.
root@U16:~# systemctl start php7.0-fpmC- Install FFMPEG using below command.
root@U16:~# apt install ffmpegD- Install ImageMagick using command below
root@U16:~# apt install imagemagickE-Install jpegtran using command below
root@U16:~# apt install libjpeg-progsF- Install Exiftool using command below
root@U16:~# apt install exiftoolAll required package installation is done successfully, let test Nginx web server and PHP installation by executing PHP script to get PHP version info.
Step 3- Verify PHP installation
Command First Modify Nginx default VHost or SMB to configure PHP and it should look like as below.
Open default SMB using command below
root@U16:~# vi /etc/nginx/sites-available/defaultYour Nginx SMB should be like this.
 server {
        listen 80 default_server;
        listen [::]:80 default_server;

        # SSL configuration
        #
        # listen 443 ssl default_server;
        # listen [::]:443 ssl default_server;
        #
        # Note: You should disable gzip for SSL traffic.
        # See: https://bugs.debian.org/773332
        #
        # Read up on ssl_ciphers to ensure a secure configuration.
        # See: https://bugs.debian.org/765782
        #
        # Self signed certs generated by the ssl-cert package
        # Don't use them in a production server!
        #
        # include snippets/snakeoil.conf;

        root /var/www/html/;

        # Add index.php to the list if you are using PHP
        index index.php index.html index.htm index.nginx-debian.html;

        server_name _;

        location / {
                # First attempt to serve request as file, then
                # as directory, then fall back to displaying a 404.
                try_files $uri $uri/ =404;
        }
   # pass the PHP scripts to FastCGI server listening on 127.0.0.1:9000
        #
        location ~ \.php$ {
                include snippets/fastcgi-php.conf;
        #
        #       # With php7.0-cgi alone:
        #       fastcgi_pass 127.0.0.1:9000;
        #       # With php7.0-fpm:
                fastcgi_pass unix:/run/php/php7.0-fpm.sock;
        }

        # deny access to .htaccess files, if Apache's document root
        # concurs with nginx's one
        #
        location ~ /\.ht {
                deny all;
        }
}
Save and Exit from File.
Create info.php file to default path /Var/www/html/ using command below
root@U16:~# vi /var/www/html/info.phpAnd append below syntax into this file.
phpinfo();
?>
Save and Exit from file.
Open the browser and put this URL to check PHP info.
If everything configure properly you will get page like below.

Step 4- Download and Install WPT package.
Download Latest WPT 3.0 package from below link.
First, go to dir /var/www/html and create a new dir name WPT and run below command.
root@U16:/var/www/html/WPT# wget https://github.com/WPO-Foundation/webpagetest/releases/download/WebPageTest-3.0/webpagetest_3.0.zipNow Extract the downloaded package using the command below.
root@U16:/var/www/html/WPT# unzip webpagetest_3.0.zipNow Move extracted WWW folder to path /var/www/html/public using command below.
root@U16:/var/www/html/WPT# mv www/ ../webpagetestChange root document permission using command below.
root@U16:/var/www/html# chown -R www-data:www-data webpagetest/Step 5- Modify Nginx default VHost change root path and add index.php.
server {
        listen 80 default_server;
        listen [::]:80 default_server;

        # SSL configuration
        #
        # listen 443 ssl default_server;
        # listen [::]:443 ssl default_server;
        #
        # Note: You should disable gzip for SSL traffic.
        # See: https://bugs.debian.org/773332
        #
        # Read up on ssl_ciphers to ensure a secure configuration.
        # See: https://bugs.debian.org/765782
        #
        # Self signed certs generated by the ssl-cert package
        # Don't use them in a production server!
        #
        # include snippets/snakeoil.conf;

        root /var/www/html/webpagetest;

        # Add index.php to the list if you are using PHP
        index index.php index.html index.htm index.nginx-debian.html;

        server_name _;

        location / {
                # First attempt to serve request as file, then
                # as directory, then fall back to displaying a 404.
                try_files $uri $uri/ =404;
        }
Save and Exit from the file.
Restart Nginx using the command below.
root@U16:~# systemctl restart nginxStep 6- Validate WPT installation and check.
Open web browser put this URL - http://192.168.28.120/install/
If everything installed correctly you will get page like below.

Open browser and hit Server IP- http://192.168.28.120/
You Will get page like below.
Congrats Installation completed successfully.
Step 7- Get API Key and configure it.
You can get the API Key from link below following the instruction.
Lest configure key so that we can run the first test by modifying file below.
Go to path /var/www/html/webpagetest/settings
Create a copy file below
locations.ini.sample = locations.ini
connectivity.ini.sample = connectivity.ini
root@U16:~# cd /var/www/html/webpagetest/settings/
root@U16:/var/www/html/webpagetest/settings# cp locations.ini.sample locations.ini
root@U16:/var/www/html/webpagetest/settings# cp connectivity.ini.sample connectivity.ini
Lets put key in the file name locations.ini.
root@U16:/var/www/html/webpagetest/settings# vi locations.iniYour file should look like below. go to end of the file and add you key.
[WPT_Dulles_IE8]
browser=IE 8
label="WebPagetest.org Dulles, VA - IE8"
relayServer="https://www.webpagetest.org/"
relayKey=**************
relayLocation=Dulles_IE8
Save and exit from file and run your First Test.
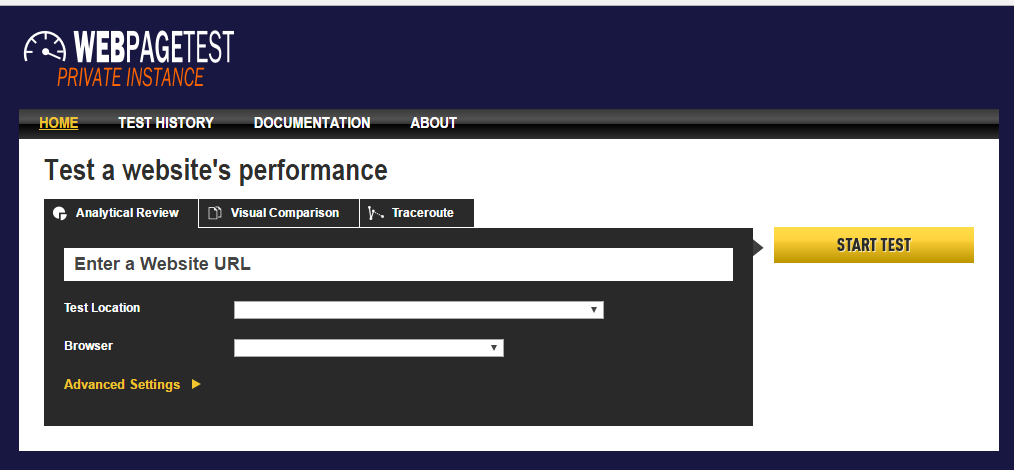
Now your Instance look like below, Including Test location and Brower Name.

Congrats, You have successfully configured your WPT private Instance.
