7 iCloud Mail Tips for Better a Email Experience
Apple hands out free email addresses with every new Apple ID registered. It might not be the powerhouse that is Gmail, but iCloud Mail is still a useful email service to have at your disposal.
If you already use your iCloud Mail address, make sure you’re familiar with features like aliases and mail rules. If you’ve avoided using your iCloud address because you’re convinced it’s useless, these tips might change your mind.
1. Access Mail From Anywhere With iCloud.com
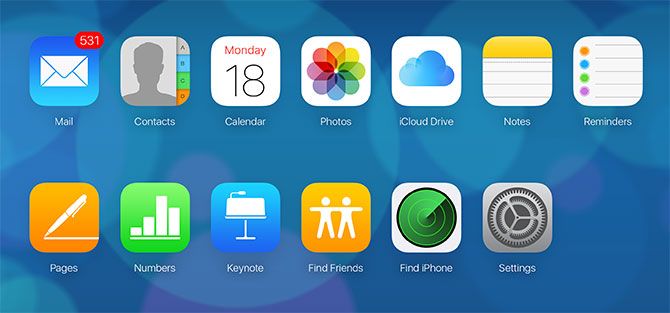
Probably the best way to use iCloud Mail is through a browser. If you log in at iCloud.com using your Apple ID and select Mail, you get access to a few other features that a traditional mail client cannot provide (including Apple Mail).
This version of iCloud Mail has a decent search engine and filtering options at the bottom of the screen for only showing unread messages. You can also drag and drop messages into folders you have created in the left-hand sidebar.
Nearly all the other tips listed here rely on the web version of iCloud Mail. Unfortunately you can’t access this version from a mobile device, so you’ll need to log in from a desktop browser on your Mac or PC.
2. iCloud Mail Aliases Can Deal With Spam
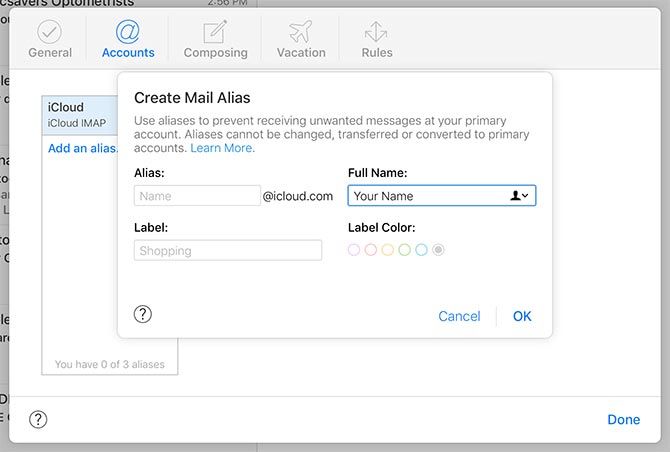
Aliases allow you to create up to three dummy @icloud.com email addresses. You will receive any email sent to these alias addresses until you decide to deactivate them. You can also filter your inbox by alias to remove unwanted messages from showing up.
Aliases provide a fairly useful barrier against spam (without needing a disposable email service). If you’re concerned about handing out your real email address when signing up for a service or entering a competition, you can hand over an alias instead. You’ll still be able to use the service or claim your prize, and you can disable the alias at a later date (or simply filter it out).
To create an alias, log in to iCloud.com and click Mail. Click on the cog icon in the bottom-left hand corner of the screen and select Preferences. Choose Accounts followed by Add an alias, then pick a suitable alias name. You can only register @icloud.com email aliases.
3. Create Rules for iCloud Mail
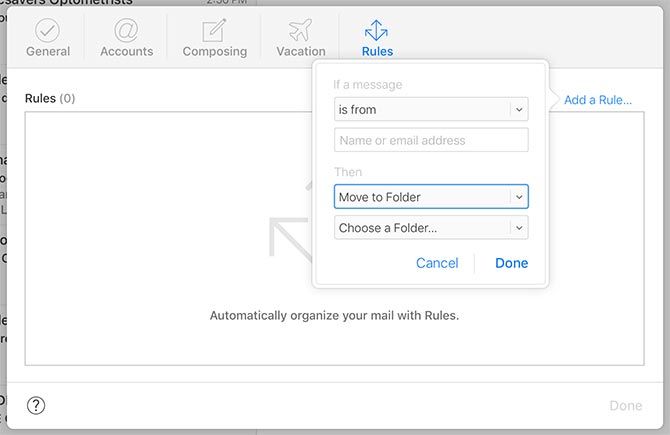
Rules are one of the features that makes Gmail such a powerful mail client. These allow you to route mail to specific folders or skip the inbox altogether. You can filter by criteria like subject line, originating email address, or whether it’s addressed to one of your aliases.
You can create rules in iCloud Mail by logging into iCloud.com and clicking Mail. Next click on the cog icon in the bottom-left corner, then choose Preferences. Select Rules and click Add a Rule. Now set your incoming mail criteria followed by the desired action, then save it with Done.
These rules apply to all your devices going forward. That means that even though you can’t set up rules on your iPhone Mail client or in Apple Mail for macOS, iCloud will still adhere to these rules on the server side.
4. Send Large Files With Mail Drop

Did you know you can send files up to 5GB in size using iCloud Mail? Using a feature called Mail Drop, iCloud Mail stores your file in the cloud and lets the recipient download it using a link contained in your email. Apple doesn’t state how big the maximum attachment is before Mail Drop kicks in. Any files you deliver using Mail Drop will only be available for download for 30 days.
You may need to turn on this feature before you can use it. Log in to iCloud.com and click Mail. Click on the cog in the bottom-left corner then choose Preferences. Under Composing, enable Use Mail Drop when sending large attachments.
To attach a file to your email message, simply drag and drop it onto your message while composing. You can also click on the Attach button (it looks like a paper clip) and select a file using this method. If email doesn’t cut it, check out a few other ways you can send large files.
5. Forward Mail Elsewhere
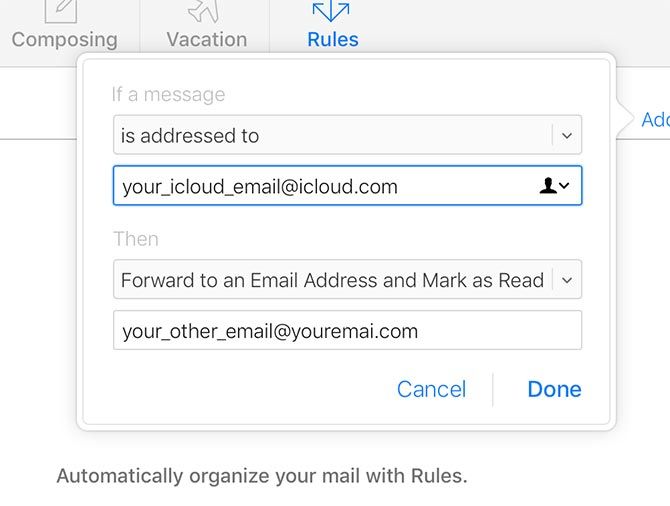
One of the most useful mail rules is the ability to forward all incoming mail to another email address. This means you never have to check your iCloud mail, and can instead use it as an alias for your other accounts.
You can easily set this up using iCloud Mail rules. Log in to iCloud.com and click on Mail. Click on the cog icon in the bottom-left corner, then choose Rules. Under If a message choose is addressed to, then input your iCloud Mail email address in the first field.
In the next field under Then choose Forward to an Email Address and Mark as Read, then input the email address at which you want to receive your messages in the field below. Now all your incoming iCloud mail will be forwarded to your main email account.
Using Gmail, you can filter these incoming messages further. And if you’re using your iCloud Mail as an alias and start receiving spam, you can always delete this rule.
6. Set Up an Autoresponder in iCloud Mail
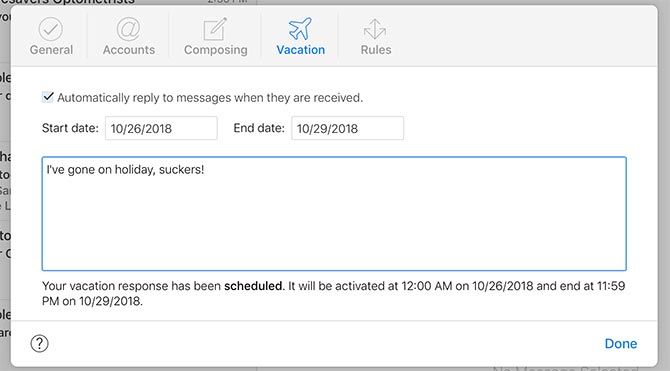
What’s an email client without an autoresponder? Apple’s iCloud Mail autoresponder is pretty barebones, but it gets the job done. You can’t set a daily autoresponder that kicks in while you’re out of the office, but you can set up a vacation autoresponder that replies to messages while you’re way.
Login to iCloud.com and click on Mail. In the bottom-left corner click on the cog followed by Preferences. Next click on Vacation, enable Automatically reply to messages when they are received, and input the dates during which you’ll be away.
Finally, add the message you want to send anyone who tries to contact you during this period.
7. Download Your Entire Mail History
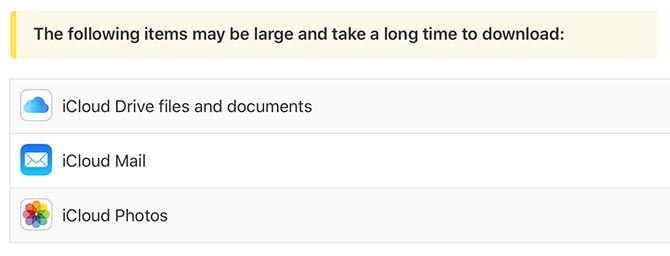
If you want to download the entire contents of your iCloud Mail for archival purposes, you can do so by requesting a copy of your data from Apple. You could also configure a regular desktop email client to pull everything down, and then archive it using that instead.
To make a data request head to privacy.apple.com and log in with your Apple ID. Underneath Obtain a copy of your data, click Get started, then scroll to the bottom of the page and check iCloud Mail. If you want a copy of any other data, like your iCloud Drive contents, iCloud Photo Library, or personal data that Apple keeps on its servers, add it to the download.
Hit Continue, then specify a download size for the archive files Apple will deliver. Finally, hit Complete request and wait. Apple will take a few days to prepare the data, then you’ll get an email notifying you that your download is ready. You can then log back in to Apple’s privacy mini-site to start the download.
Not the Worst Email Service in the World
iCloud Mail is a no-frills email service, but it works well enough. The rules you set up are followed regardless of which device you use. Mail Drop is a genuinely useful way of sending large files. And if you’re not fond of Apple’s mail service, you can use it as another alias with automatic forwarding.
Using Apple Mail to access your iCloud Mail account? Check out our top Apple Mail tips for Mac users.
Read the full article: 7 iCloud Mail Tips for Better a Email Experience
from MakeUseOf https://ift.tt/2CWBc7c
via IFTTT