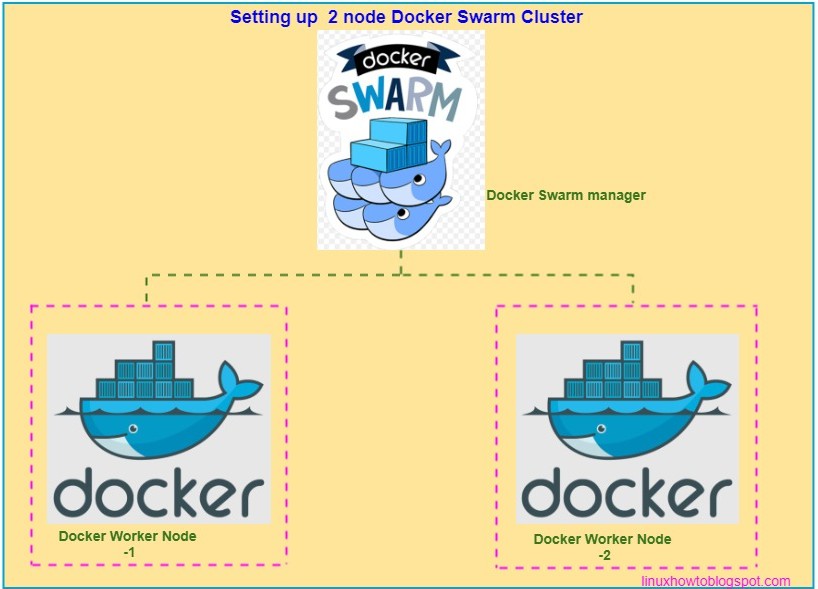
How to Setup Two Nodes Docker Swarm Cluster - Ubuntu 16.04
Docker Swarm - Docker Swarm is clustering scheduling tool for Docker Container, Using Docker Swarm IT administrator and developers can build a Cluster using Single or Multiple nodes and run container to provide high tolerance application environment.
Using Docker Swarm, we can easily upscale and downscale environment easily.
Features of Docker Swarm:
- Cluster Managment integration with Docker Engine
- Scaling
- Desired state of reconciliation
- Multi-host networking
- Load Balancing
- Rolling update

Prerequisites-
- Two Linux box installed Docker
- A user with sudo access on both the system
- Docker hub repository account
- Node 1 as Master - 192.168.102.10
- Node 2 as a worker - 192.168.102.11
Step 1- Install Docker
Please follow my previous blog - How to install Docker in Ubuntu 16.04 LTS
Step 2- Initialize Docker Swarm Cluster:
Go to Node1 (192.168.102.10) and run the following command to initialise the Docker Swarm Cluster.
Go to Node1 (192.168.102.10) and run the following command to initialise the Docker Swarm Cluster.

Your Docker Swarm cluster has initialized successfully.
Let's check your node status
Let's check your node status
Our Leader(master) node is ready.
Step 3- Join Node2 to Swarm Cluster
To Join the Swarm Cluster run following command from Node 2(192.168.102.11)
Step 3- Join Node2 to Swarm Cluster
To Join the Swarm Cluster run following command from Node 2(192.168.102.11)
Our Node2 has successfully joined the Swarm cluster. Let's verify running the command below on Leader node.
Both the node are available on Swarm manager.
Step 4- Setup docker hub login on Leader node"
We need to setup docker hub login on the leader node to pull our image, that we will use in docker-compose.yml file. let's run following command to setup docker hub login.
We will use apache docker image from my docker hub account.

Docker hub login has been set up successfully.
Step 5- Create docker-compose.yml file to deploy your stack.
To create docker-compose.yml file go to Node1(192.168.102.10) and run following command.
Append following lines into the file and save it.
Please update your docker hub repository username and your image name in the above file (amarsingh3d/apache2.4) , Save and exit from the file.
Step 6- Create the first Stack.
To create your first web stack run the following command on Leader node (192.168.102.10), it will create our first stack and service as well. service that allows our container's access from outside it acts as a load balancer.
Let's check Docker stack and Docker Service.
Check service details including how many replicas are running.
Our stack has been deployed successfully.
Step 7- Test our container service.
To test our container's service, open browser and access Leader node IP address with port 8181- https://192.168.102.10:8181

We have successfully deployed our Stack on Docker Swarm cluster.
Step 8- Scale up and Scale down our service.
We can scale up and scale down our service to add and remove any numbers of the container to server better performance for your application.
Let's use the following command:
scaleup
Verify current running container:
We are successfully able to scaleup and scaledown our service.
Both the node are available on Swarm manager.
Step 4- Setup docker hub login on Leader node"
We need to setup docker hub login on the leader node to pull our image, that we will use in docker-compose.yml file. let's run following command to setup docker hub login.
We will use apache docker image from my docker hub account.

Docker hub login has been set up successfully.
Step 5- Create docker-compose.yml file to deploy your stack.
To create docker-compose.yml file go to Node1(192.168.102.10) and run following command.
Append following lines into the file and save it.
Please update your docker hub repository username and your image name in the above file (amarsingh3d/apache2.4) , Save and exit from the file.
Step 6- Create the first Stack.
To create your first web stack run the following command on Leader node (192.168.102.10), it will create our first stack and service as well. service that allows our container's access from outside it acts as a load balancer.
Let's check Docker stack and Docker Service.
Check Docker service
Check service details including how many replicas are running.
In the above service detail, you can see both containers are running on different Node.
Our stack has been deployed successfully.
Step 7- Test our container service.
To test our container's service, open browser and access Leader node IP address with port 8181- https://192.168.102.10:8181

We have successfully deployed our Stack on Docker Swarm cluster.
Step 8- Scale up and Scale down our service.
We can scale up and scale down our service to add and remove any numbers of the container to server better performance for your application.
Let's use the following command:
scaleup
Verify running Containers- Now our service webstack_web have 4 running containers 2 on each host:
scaledown our service:Verify current running container:
We are successfully able to scaleup and scaledown our service.
