How to Share Notes App Folders on iPhone, iPad, and Mac
[the_ad id='1307']
Apple Notes has been one of my favorite stock apps for several reasons. Whether it’s the wide range of user-friendly features or intuitive UI, the app has got everything covered to give the best third-party note apps a run for their money. And with the arrival of iOS 13 and macOS Catalina, it’s got even better. Among many new features that have graced Apple’s note-taking app, what has caught my eyes is the ability to share Notes app folders on iPhone, iPad, and Mac, which can go a long way in enhancing collaboration. In this article, we are going to show you can easily share folders in Notes app.
How to Share Folders in Notes App on iPhone, iPad, and Mac
You can invite as many people as you want to your shared Notes folder. After accepting your invitation, they can make changes to the folders and collaborate seamlessly. With real-time alerts, the app keeps everyone in the loop about the latest changes. Just in case you don’t want anyone to edit the Notes folder, you can choose to give read-only permission. With that said, let’s find out how folder sharing works in the Notes app for iOS 13, iPadOS 13, and macOS Catalina.
Sharing Folders in Notes App on iOS 13 and iPadOS 13
Note: Keep in mind, your device must be running iOS 13 or iPadOS 13 to not only share a folder but also accept an invitation to collaborate. Also note that you need to first remove the lock before sharing the password-protected notes. To do so, tap on the Share button on your iOS device or the Lock button on your Mac and select Remove Lock.
1. Launch Notes app on your iPhone or iPad and open a folder.
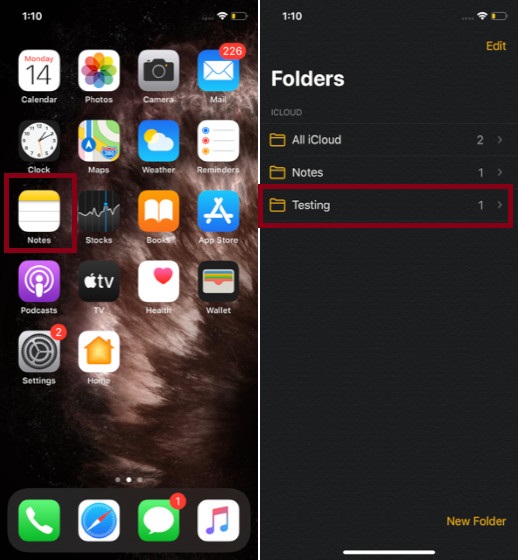
2. Now, tap on the tiny circled icon with three dots at the top right corner of the screen.
![]()
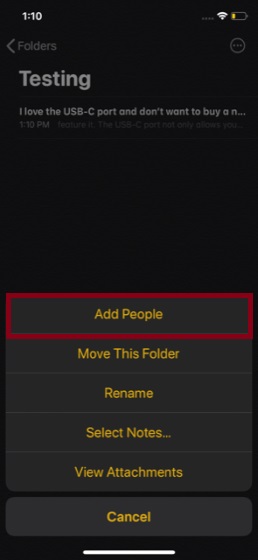
3. Next, select the “Add People” option in the menu.
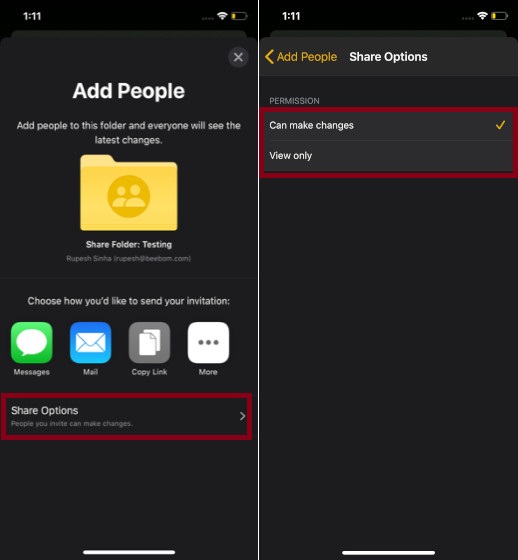
4. Next up, depending on your needs, you can now choose to allow people to only view the content or let them make changes. By default, they can view and edit the content. To do so, tap on Share Options and then select the preferred option.
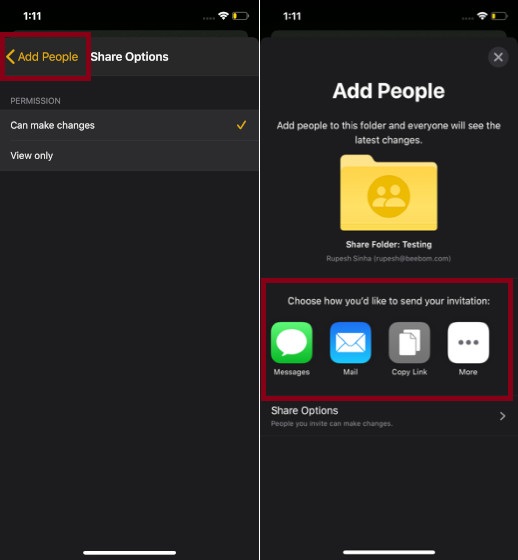
5. Up next, tap on the back button. Then, select how you want to send your invitation. For instance, you can send the invitation via iMessage, email or another preferred medium. As mentioned above, you have the freedom to invite multiple people to your shared Notes folder.
Note: Alternately, you can simply swipe left from right on the respective note folder and choose the Add People button. Then, share the folder as usual.
Sharing Folders in Notes App on macOS Catalina
1. Open the Notes app and select the folder you want to share. Then, click on the Add People button in the toolbar and choose the folder option in the menu.

2. Next, click on the drop-down arrow button to configure the sharing preferences. Then, you can grant editing or view-only permission. After that, share the folder using your preferred medium.
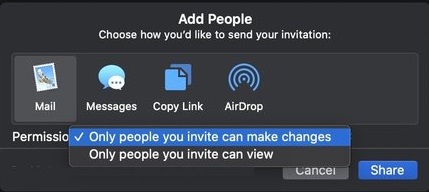
Share Notes Folders Easily on iOS 13 and macOS Catalina…
So, that’s how you can add people to your shared Notes folder for seamless collaboration across macOS and iOS devices. I have found this feature a well-timed addition to the note-taking app. If there is any con, it has to be the limitation that Apple has imposed. I think it would have been better had Apple allowed even the users of older iOS versions like iOS 12 or iOS 11 to collaborate on the shared note. Anyway, let me know your thoughts about it and what are the changes you would still like to see in the app.
[the_ad id='1307']
Source link
[the_ad id='1307']