How to Use Linux on Your Chromebook in 2020
[the_ad id='1307']
Of late, software giants are incorporating Linux into their standard operating system in one way or the other. Microsoft brought the Linux subsystem on Windows 10 and now Google has introduced Linux on Chromebooks with full-fledged Terminal and Container support. While the Linux project on Chrome OS is still in beta, the results are quite promising. If you are an IT administrator or a software developer or studying computer programming, the addition of Linux on Chromebook can be a boon for you. So, let’s go ahead and learn how to use Linux on a Chromebook right from the setup to package installation.
Use Linux on Your Chromebook in 2020
Before beginning, make sure to check if your Chromebook supports Linux or not from this page. To make it clear, if a Chromebook has been launched in 2019, it likely comes with Linux support. Apart from that, make sure to update your Chromebook to the latest version– preferably Chrome OS 79 to be able to use Linux on your Chromebook. Anyway, let’s begin with the steps.
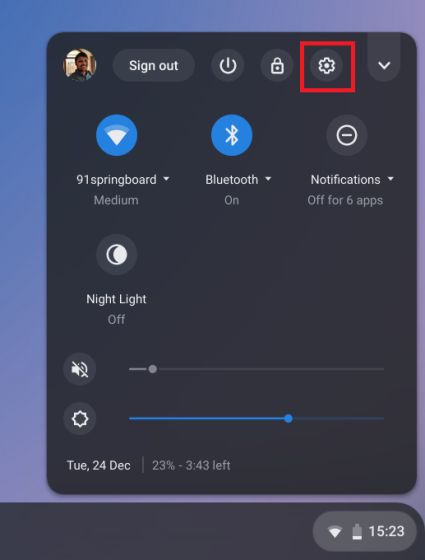
1. First of all, open the Settings page by clicking on the cogwheel icon in the Quick Settings menu.
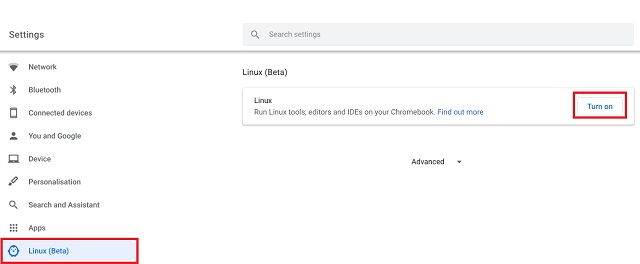
2. Next, switch to the “Linux (Beta)” menu in the left pane and click on the “Turn on” button.
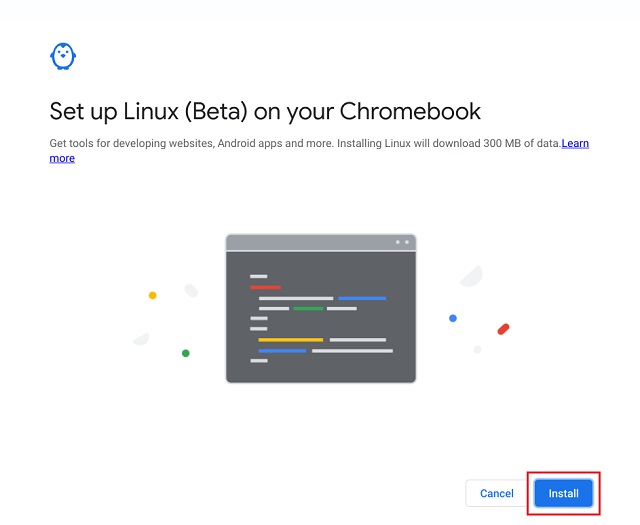
3. A setup dialog will open up. Now, just click on the “Install” button and it will start downloading the necessary files to run Linux on your Chromebook.
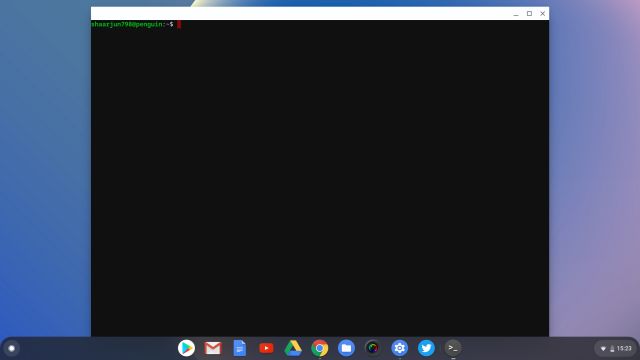
4. After the installation is done, you can use the Linux Terminal just like any other app. Open the launcher and run the “Terminal” app. Voila, there you have it!
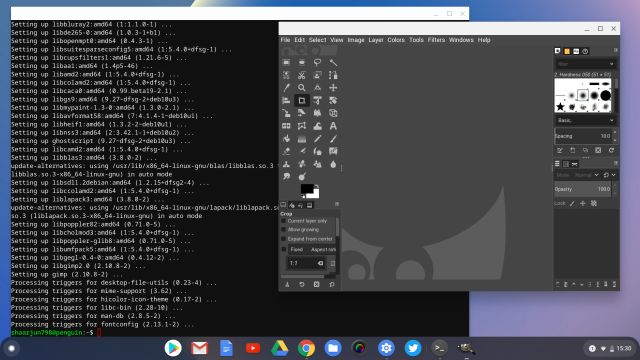
5. To test the Linux terminal, we installed the GIMP image editor on our Chromebook and the installation went through without a hitch. However, the performance is not that great as GIMP is running in a Linux container. But we expect it to get better after the project exits the Beta program.
6. Apart from that, you must know that Chrome OS and Linux have different file systems. So to access the local folders and files on Linux, you will have to copy the files from Downloads and paste them into the Linux folder.
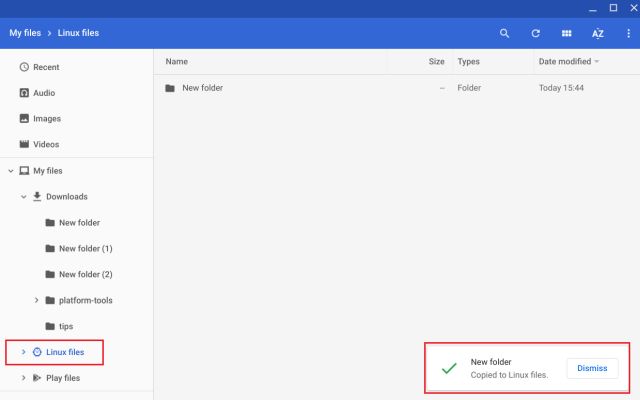
7. However, if you don’t want to make a duplicate copy then right-click on the folder that you want to share and click on “Share with Linux”. Now, it will show up in Linux’s mnt/chromeos/myfiles/downloads directory.

8. In case you want to learn more about Linux and how to use it on a Chromebook, we have already covered a list of handy Linux commands in a separate article. Apart from that, you can also check out our article on the best Linux apps and the best online resources to learn this powerful operating system.
Enable Linux on Your Chromebook and Open The Door of Endless Possibilities
So that was our short article on how to use Linux on a Chromebook. The steps are quite easy and straightforward so you don’t need to change your update channel or make any changes to Chrome flags. Simply, go ahead and enable Linux on your Chromebook by following the guide. And if you want to learn more tips and tricks of Chrome OS, head over to our separate article. Anyway, that is all from us. If you are facing any problem while installing Linux, comment down below and let us know the issue.
[the_ad id='1307']
Source link
[the_ad id='1307']