How to Convert Automator Actions as Apps on Mac
[the_ad id='1307']
Despite being a highly productive tool, Apple’s Automator app has remained unexplored by a large number of macOS users. Maybe they find the app a little too complex due to the steep learning curve that it demands. Fortunately, that’s not the case with me as I have always loved exploring it and creating super handy shortcuts like the dark/light mode switch or the image resizing action. Guess what? Today, I have come across a cool hack to convert Automator actions as apps on Mac. If you find this idea worth giving a shot, let’s jump right in to try it out straight away!
Turn Automator Workflows into Apps on macOS
A little insight into how the trick works would be better in getting a good hang of the process.
So, What’s the Workaround?
As this hack requires Apple’s Automator app, the whole process seems quite straightforward. Besides, it can be performed even on older macOS versions. So, I don’t think incompatibility should be an issue for most folks. While this trick could be helpful to anyone; those, who are willing to get some pie out of the Quick Actions feature that debuted with macOS Mojave, would find it really handy.
For those unfamiliar, quick actions allow users to perform commonly used actions faster – with just a click. Though this hack can’t offer the same level of precision, it can definitely enhance productivity to a good extent. Now that everything looks clear, let’s get started with the steps, shall we?
1. Launch Automator app on your Mac.

2. Now, open Workflow and fine-tune it in line with your needs.
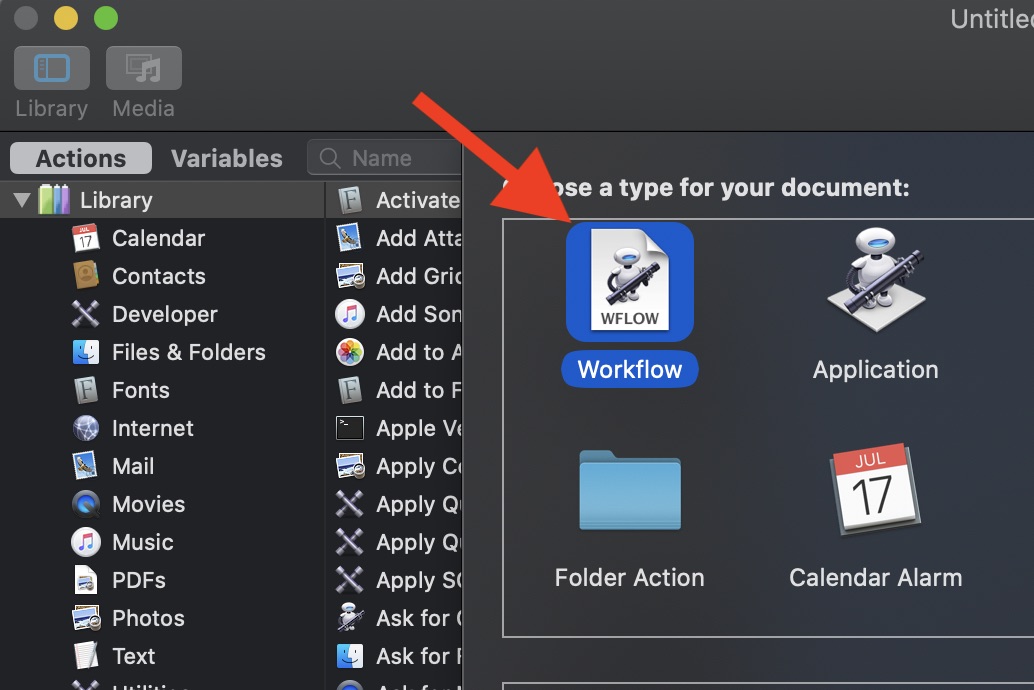
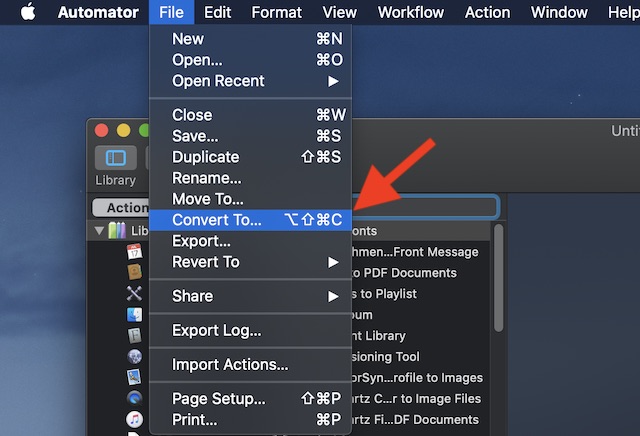
3. Next, click on the File menu and choose Convert to (or use ⌥⇧⌘C keyboard shortcut).
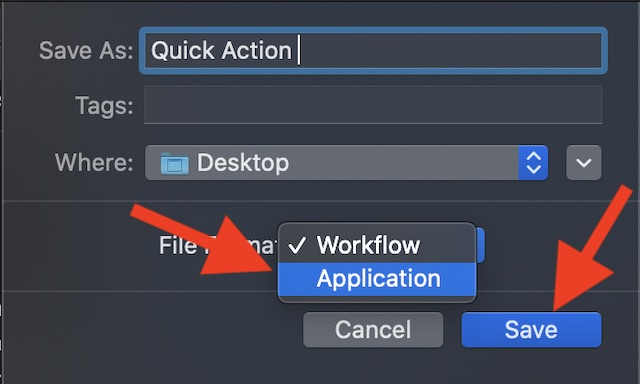
4. Next up, choose Application in the panel.
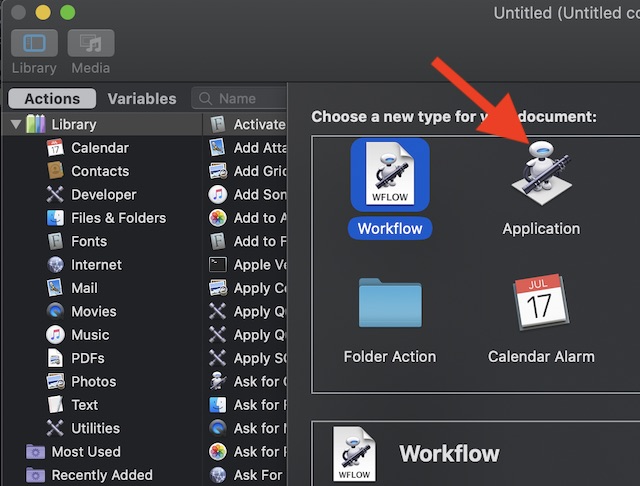
Note: For those who don’t know, Automator’s Application is the sort of standalone workflow that runs when you launch it or drop files/folders on it.
5. Up next, save the duplicate workflow as an app. To do so, click on the File menu and choose Save (or use ⌘S).
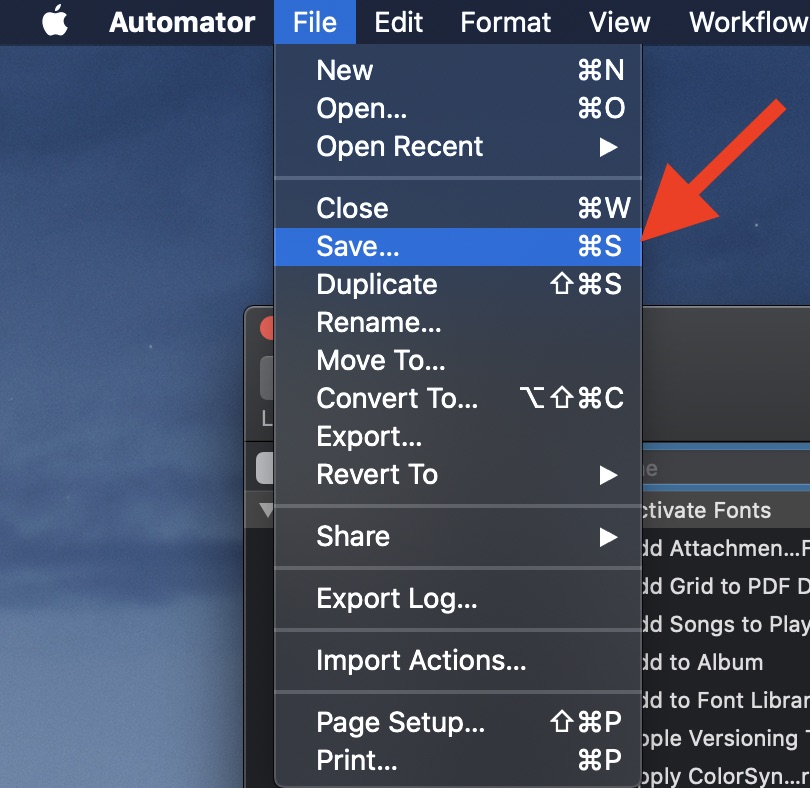
6. Now, give a suitable name to the app.
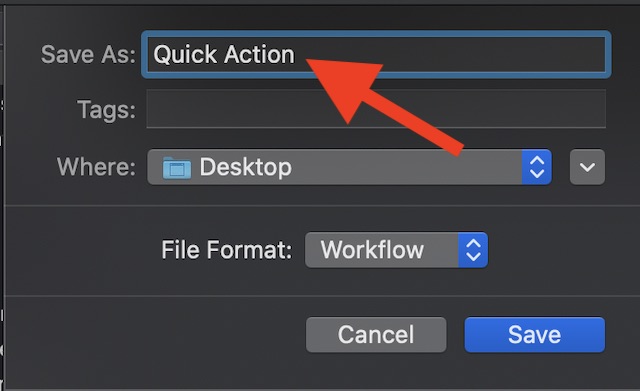
7. Finally, select Applications in the popup and click on Save to finish.
Add the Application to the Finder Toolbar
Now that you have converted the Automator action into an app, you can add it to the Finder’s toolbar to access it with ease. To do so, all you need to do is just drag the app to the toolbar while holding the command+ option keys. Once it has been added there, you can double-click the icon to launch it.
Convert Automator Actions as Apps on Mac
So, that’s how you can transform Automator workflows as applications and add them to the Finder’s toolbar. For those using Mac with macOS High Sierra or earlier, it can prove to be quite helpful in speeding up certain actions. Did you find this trick helpful? Share your thoughts in the comments below. Also, take a look at some other guides like changing the file location of the music app, deauthorizing Mac from iTunes in macOS Catalina, and hiding Apple Music in the stock Music app, if you couldn’t catch up them in the past.
[the_ad id='1307']
Source link
[the_ad id='1307']